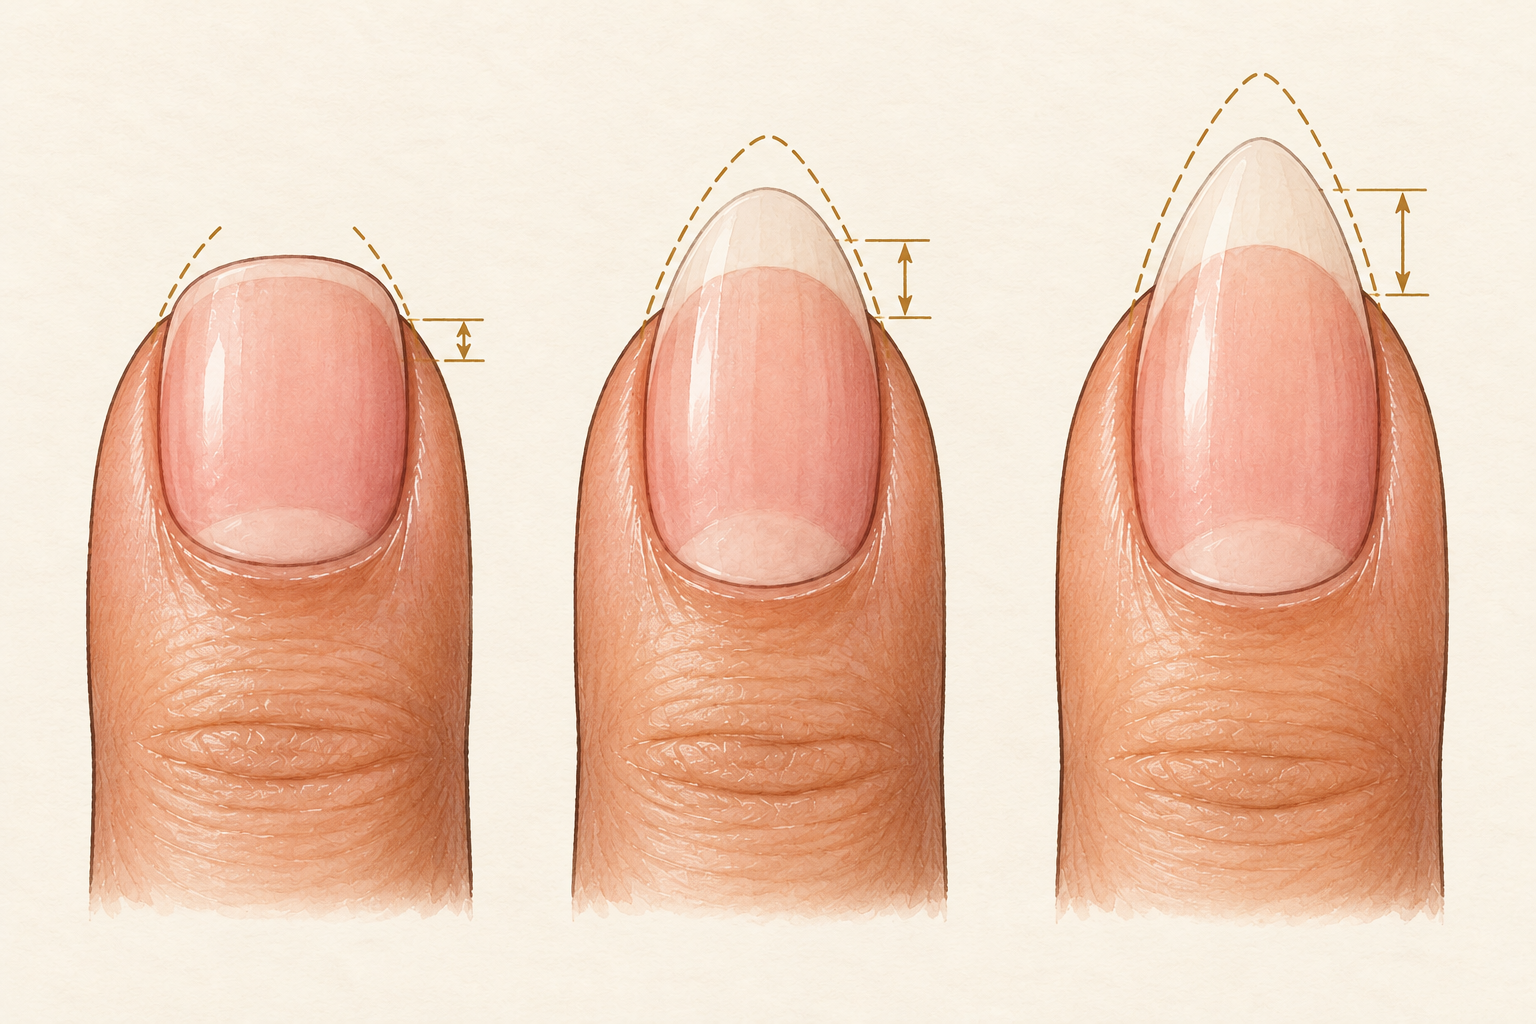
You trim your nails, the free edge looks lopsided, and the next day one corner snags on your sleeve. If you have ever stood over the bin wondering how to shape nails so they look even and survive a week of typing, the answer starts with choosing a shape that fits your hands. Work through all 12 steps, starting at number one tonight.
1. Set out a fine file and clippers
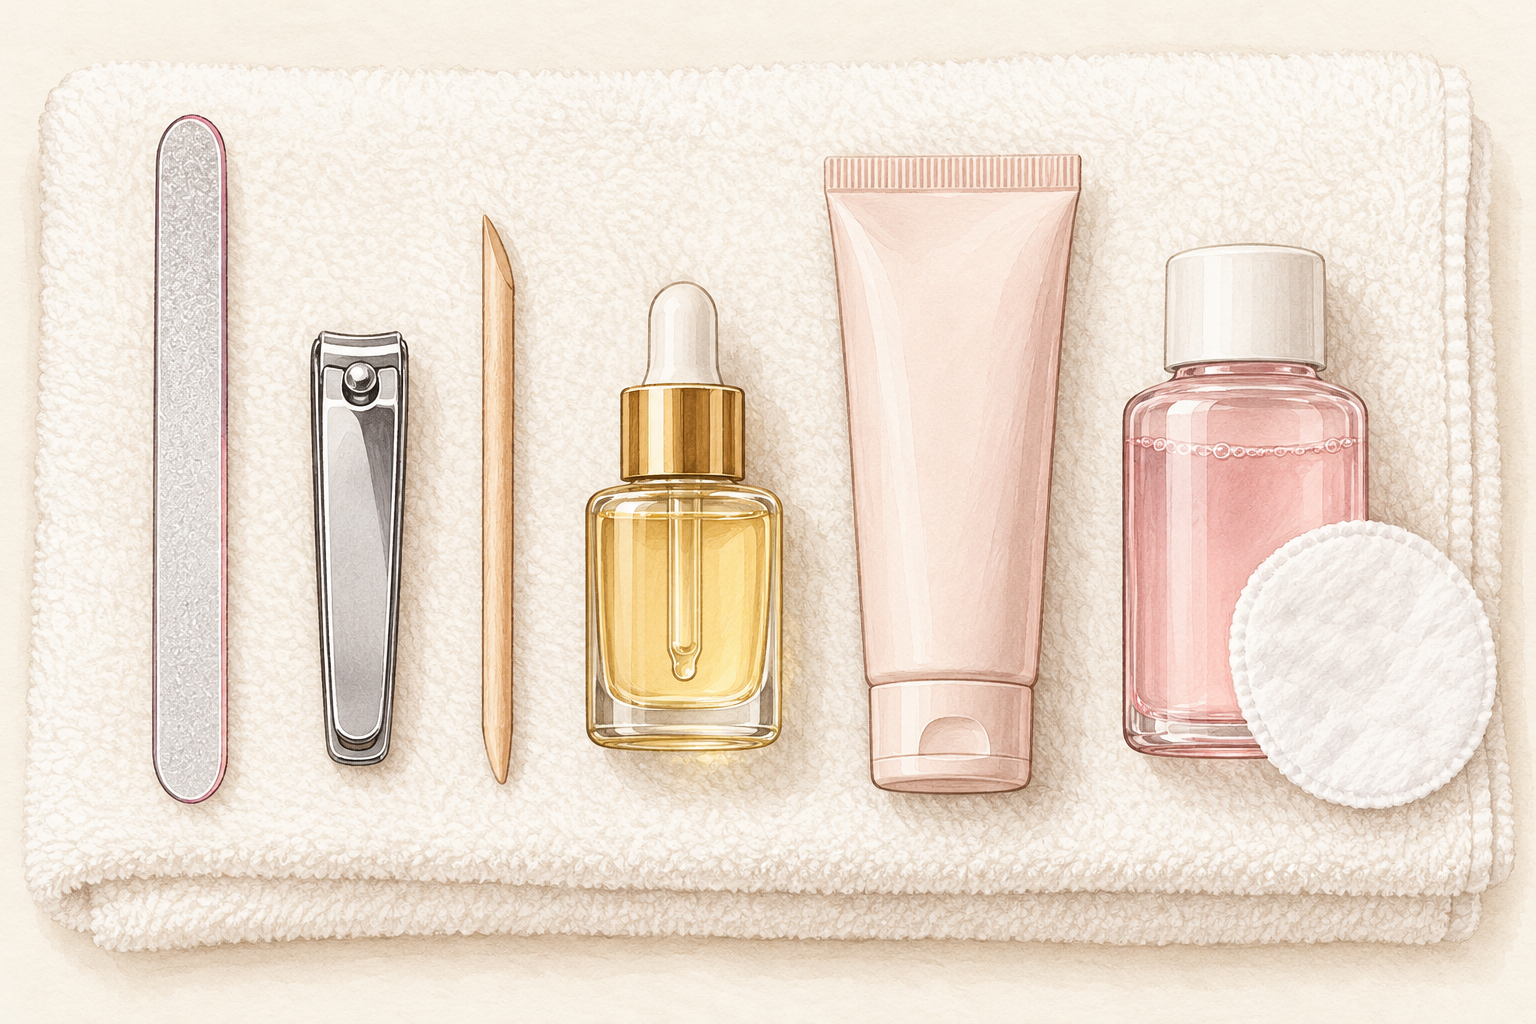
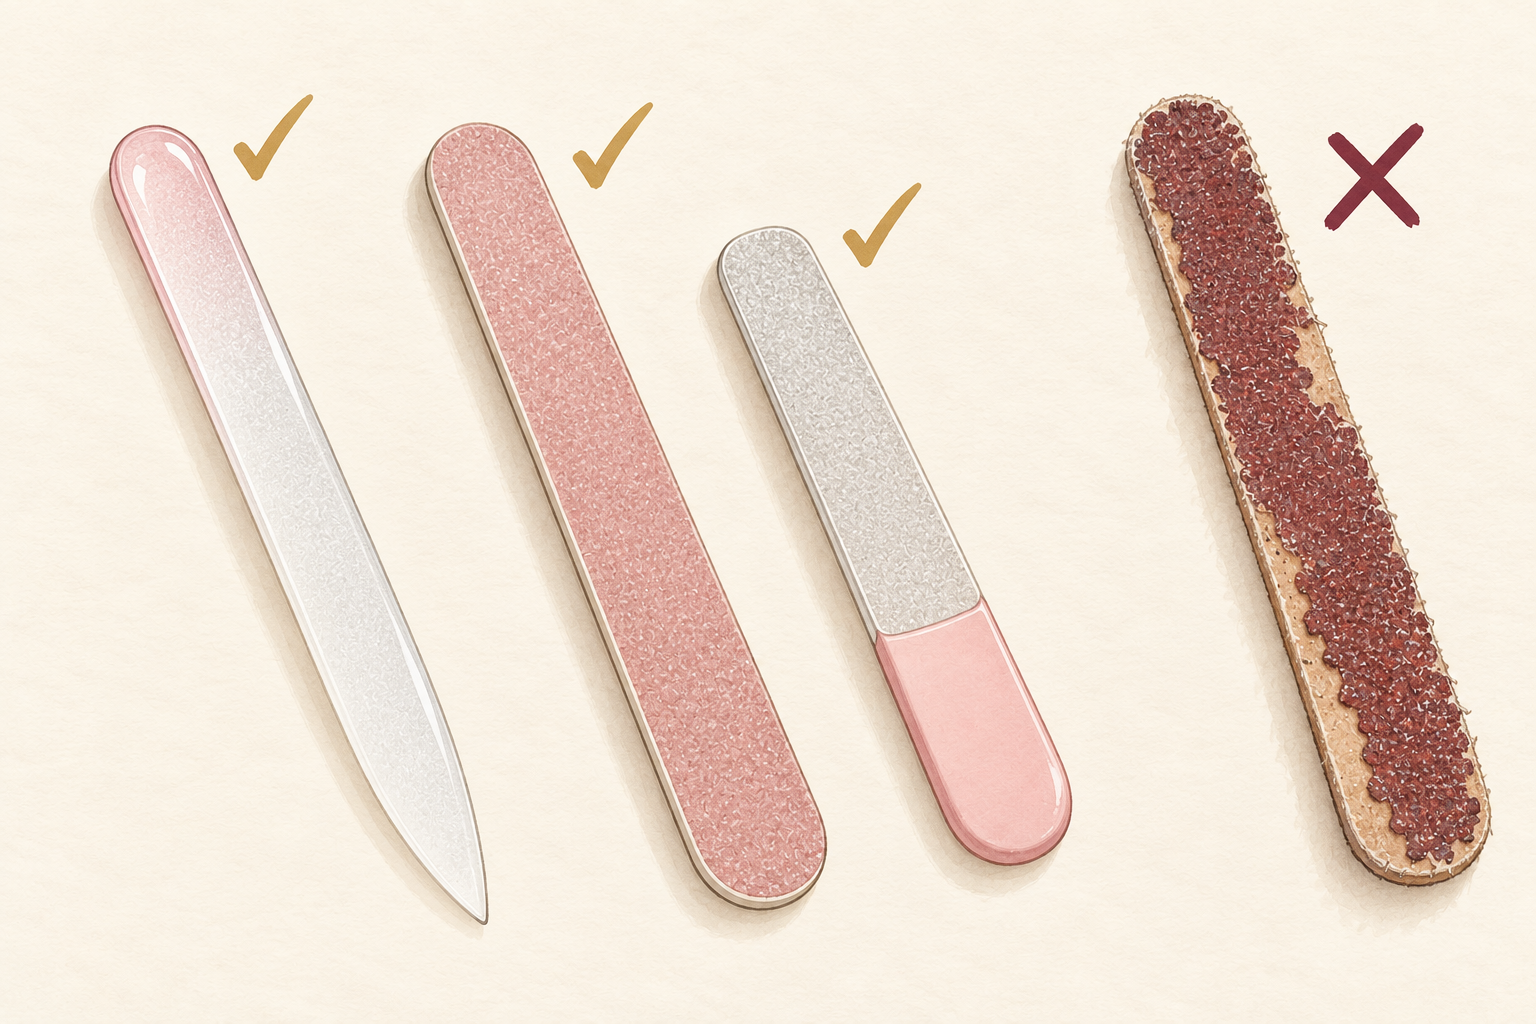
Gather clippers, a fine file around 240 grit, a soft buffer and a bowl of warm water before you start. A coarse file shreds the edge and leaves tiny splits, so choose a fine one. A glass file is gentle and easy to rinse clean. Sit at a table under a good lamp, and put a tissue down to catch the clippings. Wash your hands first, and dry them well. Having everything in front of you stops you from stopping halfway through with one nail done and nine to go. Keep a small bin or a bag at your feet for the clippings.
2. Read your nail bed
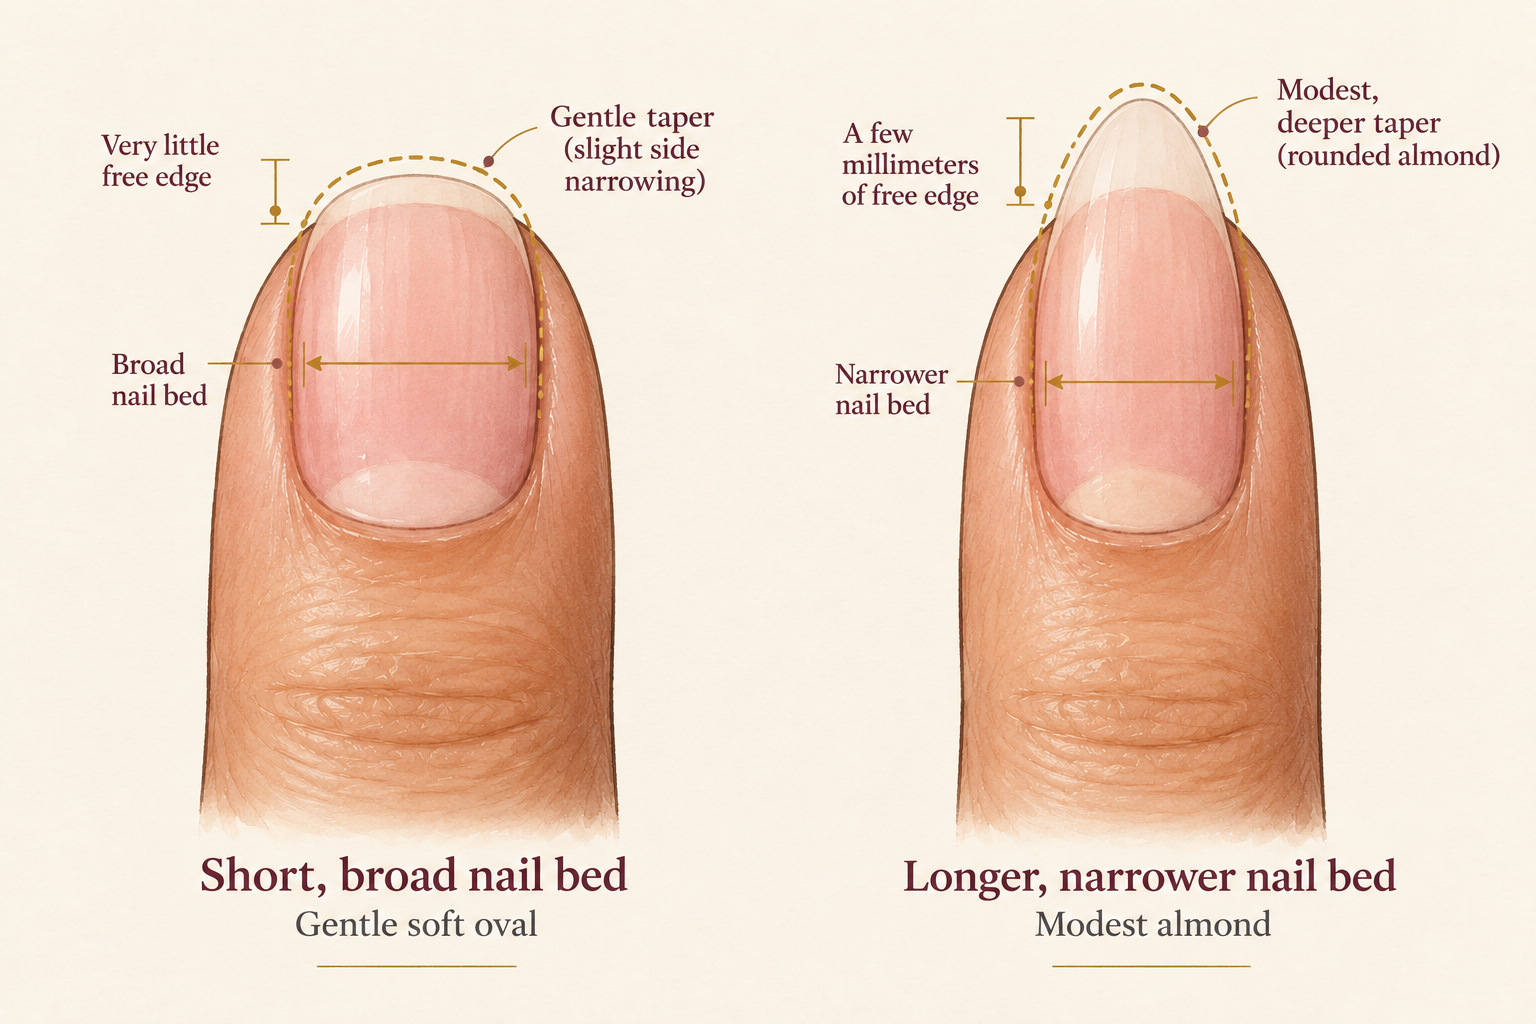
Look at the pink part of the nail from above and notice if it is long and narrow, short and wide, or somewhere between. A long narrow bed suits almost any shape, including almond and oval. A short wide bed looks longer with an oval or a soft almond tip. A nail bed that curves a lot looks best with a round or squoval edge. There is no wrong answer, only what you like with your own hands. Compare all ten, because your thumbs often differ from your pinkies. Press your finger flat on a table, and the width you see is the width you are shaping around.
3. Pick a shape for your fingers and your week
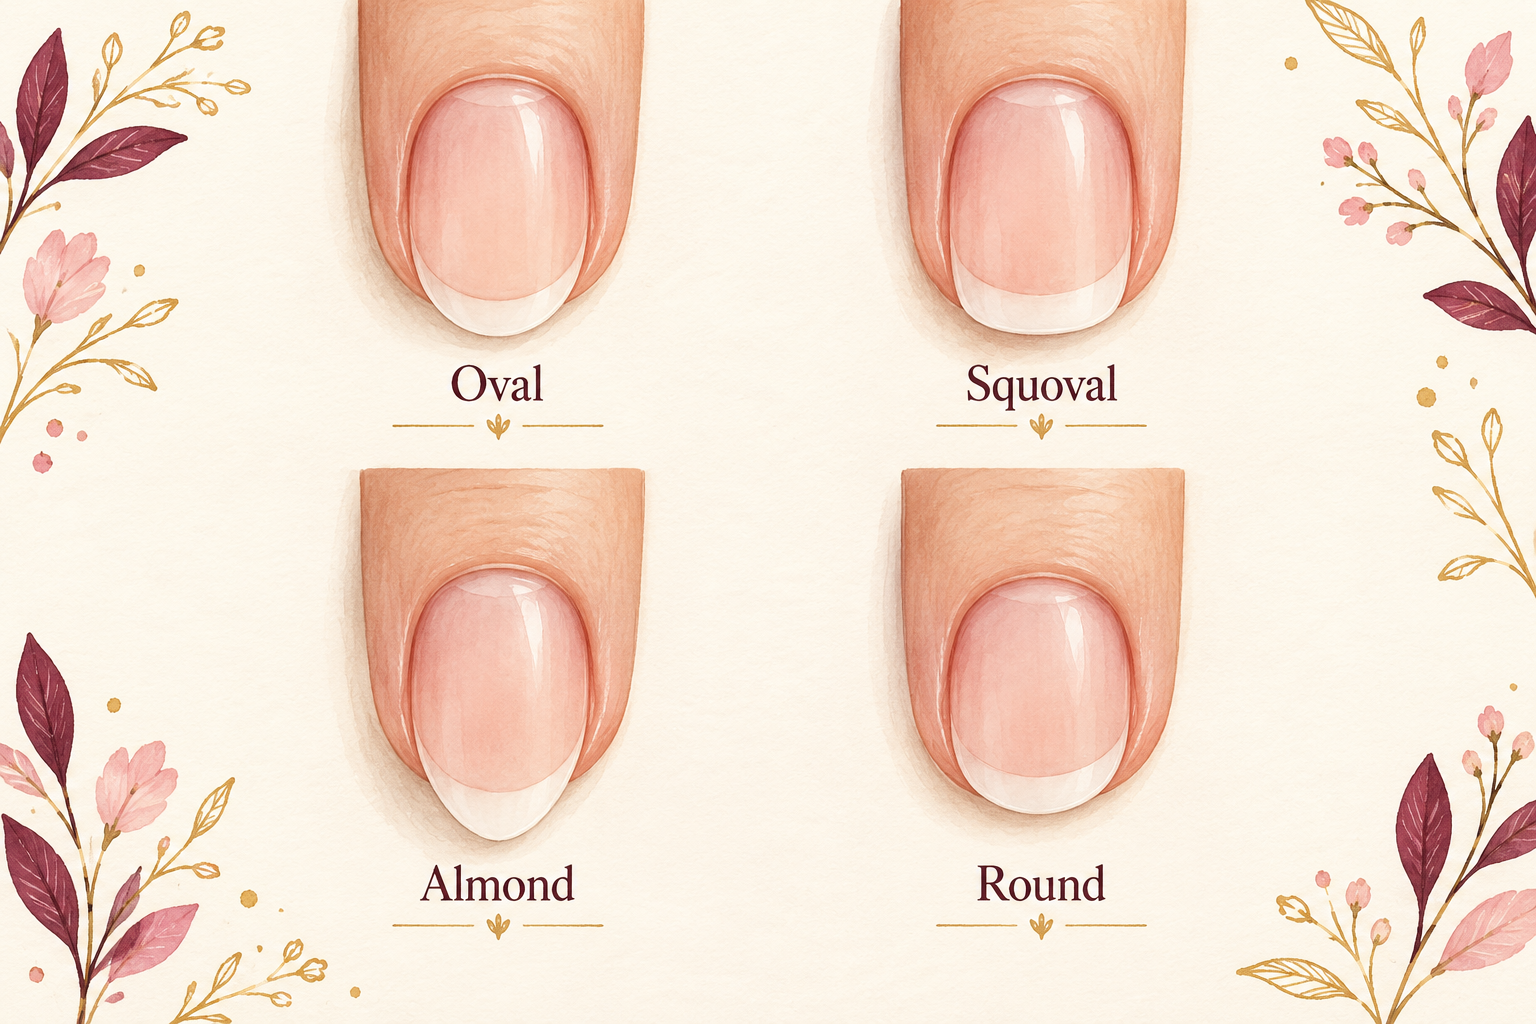
Choose oval if you want your fingers to look longer, almond for a slim, dressed up look and squoval if you type all day. Squoval is a square with rounded corners, and it is the toughest of the lot. Pointed and square shapes catch on clothes and break at the corners. Short nails love a gentle round or oval. Think about what your hands do, such as typing, washing up or carrying bags. If you are unsure, start with an oval, which flatters most hands and is easy to file at home. That is the safest answer to how to shape nails when you are new to filing. Almond fans who are still learning can compare notes with how to shape almond nails later.
4. Soften your nails before you cut
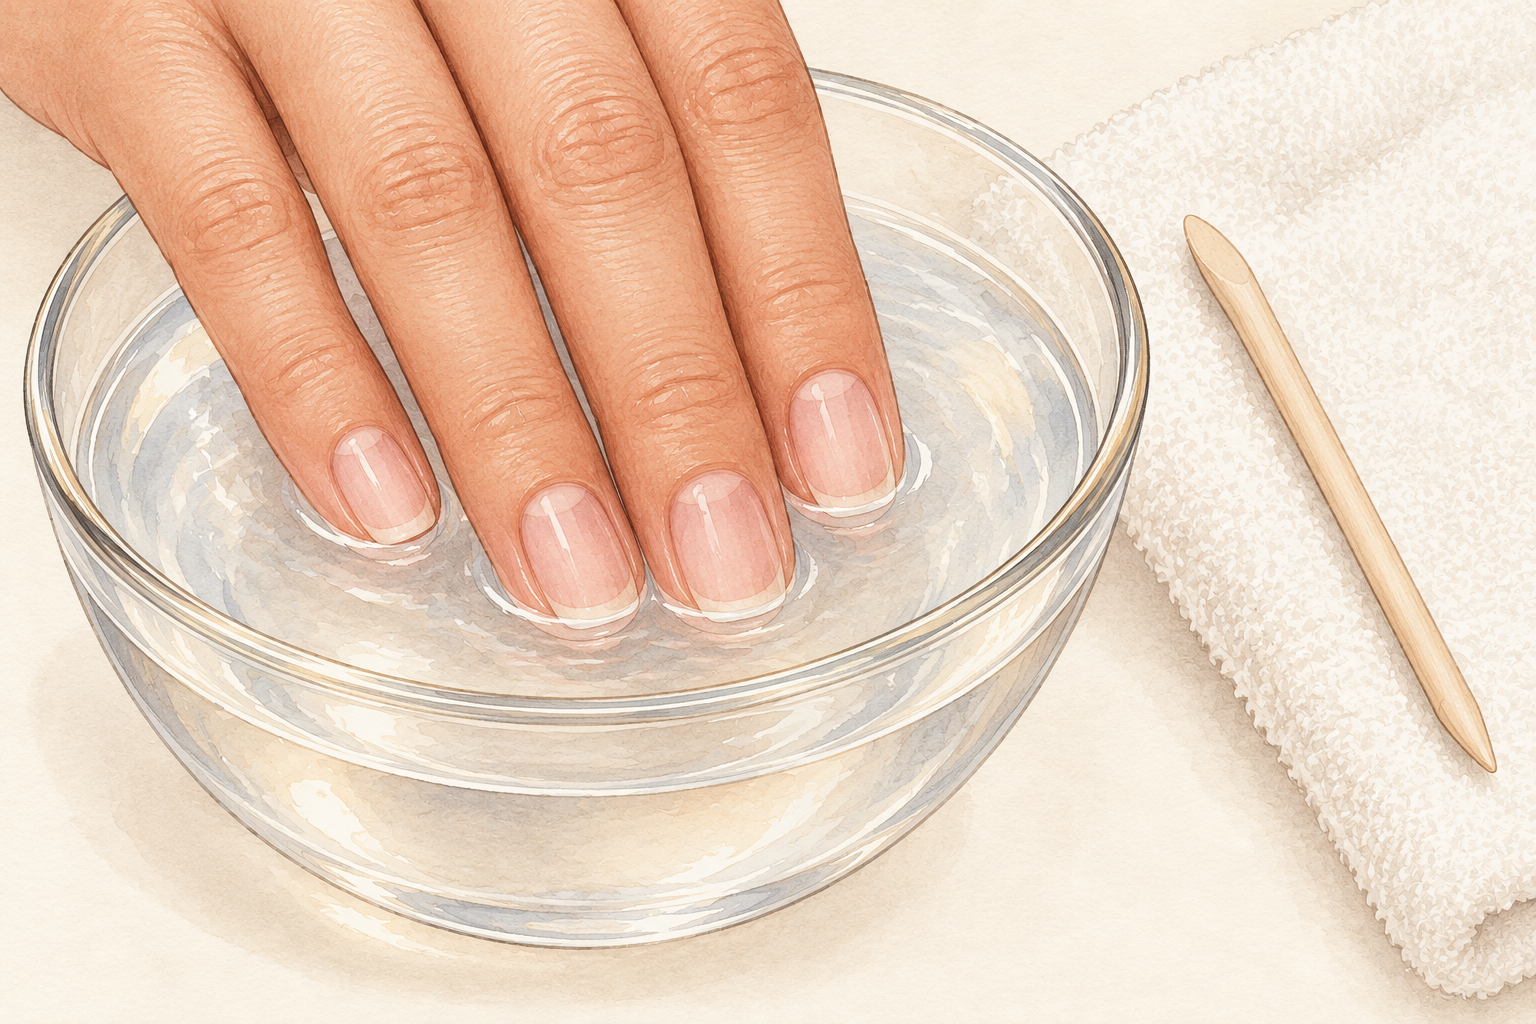
Dip your fingertips in warm water for two minutes, then pat them dry. Soft nails cut cleanly, while dry ones crack and split under the clippers. Skip this on very soft nails, which can bend and tear. Sit with your hands in your lap and take your time. Work in good light so you can see where the nail ends. Do the shaping at the end of the day rather than the start, since you will not rush it when your schedule is quiet. Skip the soak if your nails already feel soft.
5. Clip the length in small snips
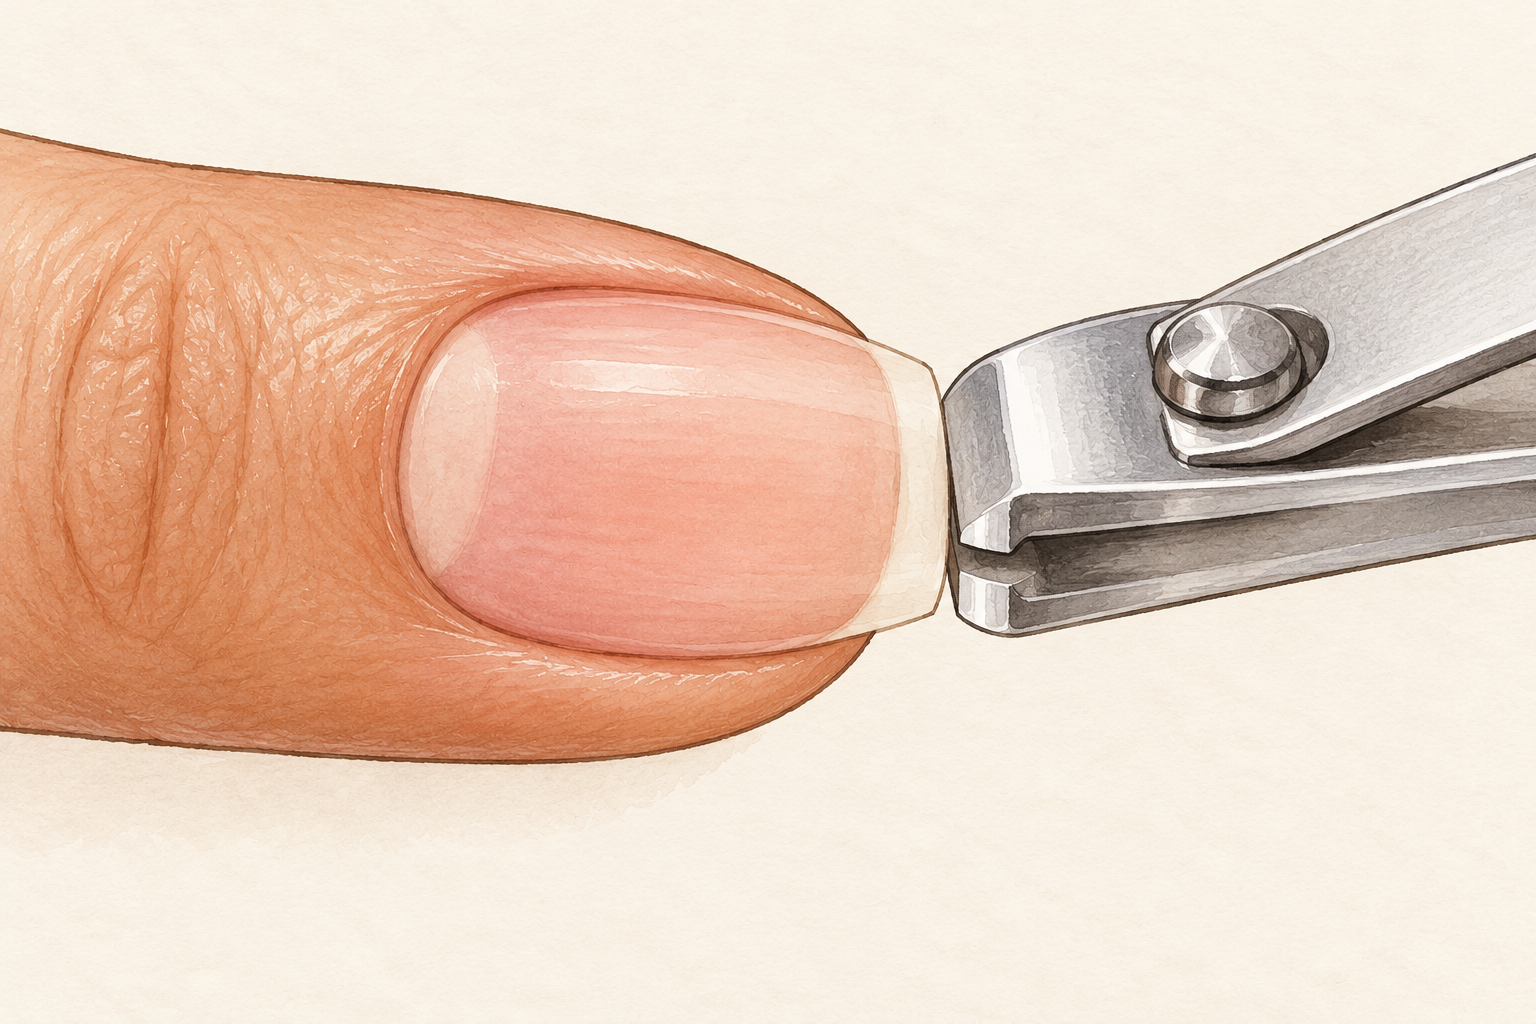
Cut straight across with several small snips, and leave the length a little longer than you want. One big bite cracks the nail, and several small ones leave a clean edge. Keep a hint of white at the tip so you do not cut into the skin below. You can always take more off, but you cannot put it back. Cut each nail the same distance beyond the finger. Catch the clippings on your tissue so they do not fly across the room, and never clip into the corners, because a deep corner cut leaves a spike that grows into the skin. Clipping has its own rules, so check how to cut nails before the file comes out.
6. File the tip flat first
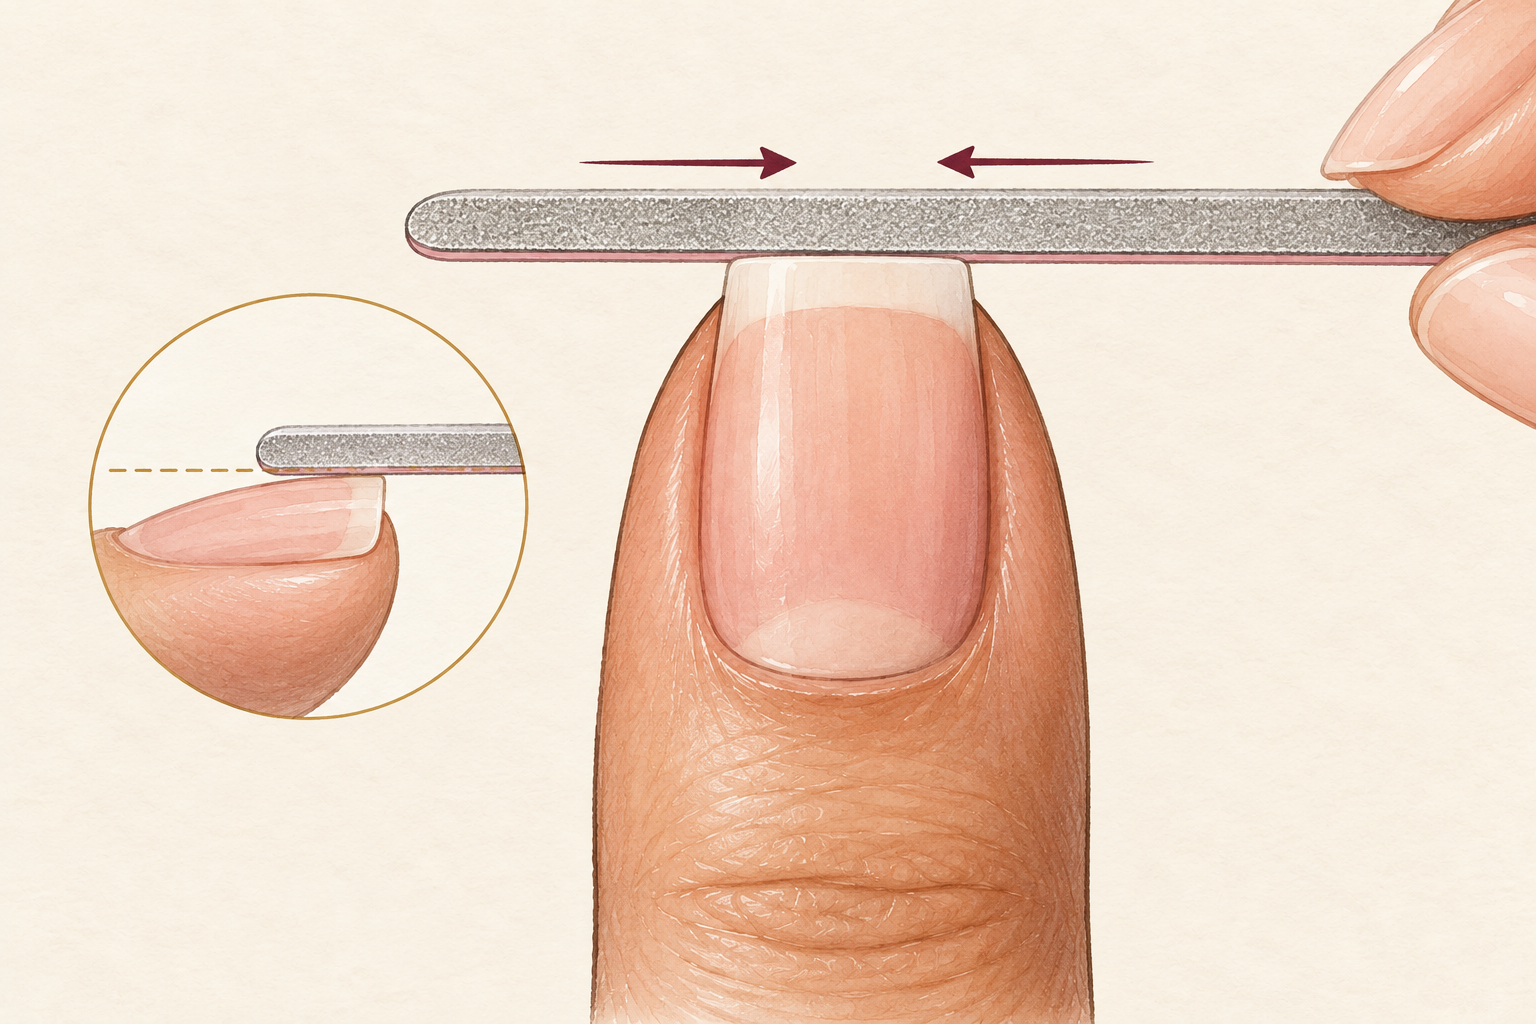
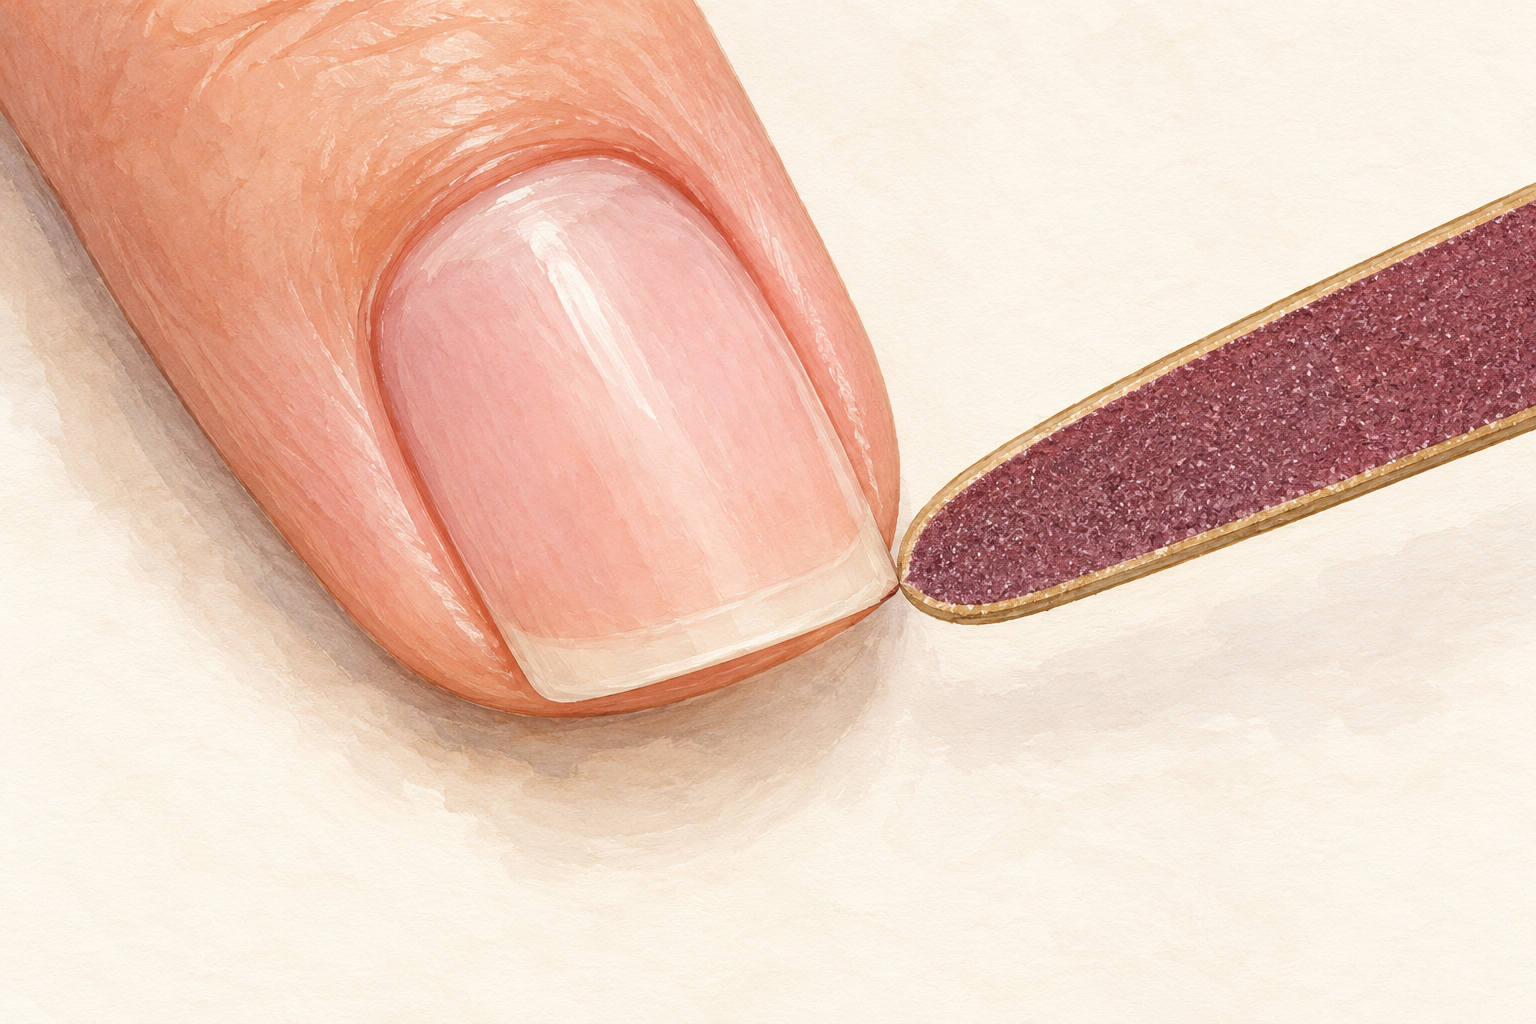
Hold the file flat under the nail and glide it straight across the free edge to make a clean flat top. Always use one direction, from the outer edge toward the middle, never sawing back and forth. Sawing tears the layers apart. Two or three light passes per side is plenty. If you hear a scraping sound, ease up. Start with a flat edge for every shape, because it gives you a clear guide to round, soften or point from. Run a fingertip over the top and check that it feels smooth. Hold the file steady and move your finger across it, which is easier on the hand than moving the file.
7. Soften the corners
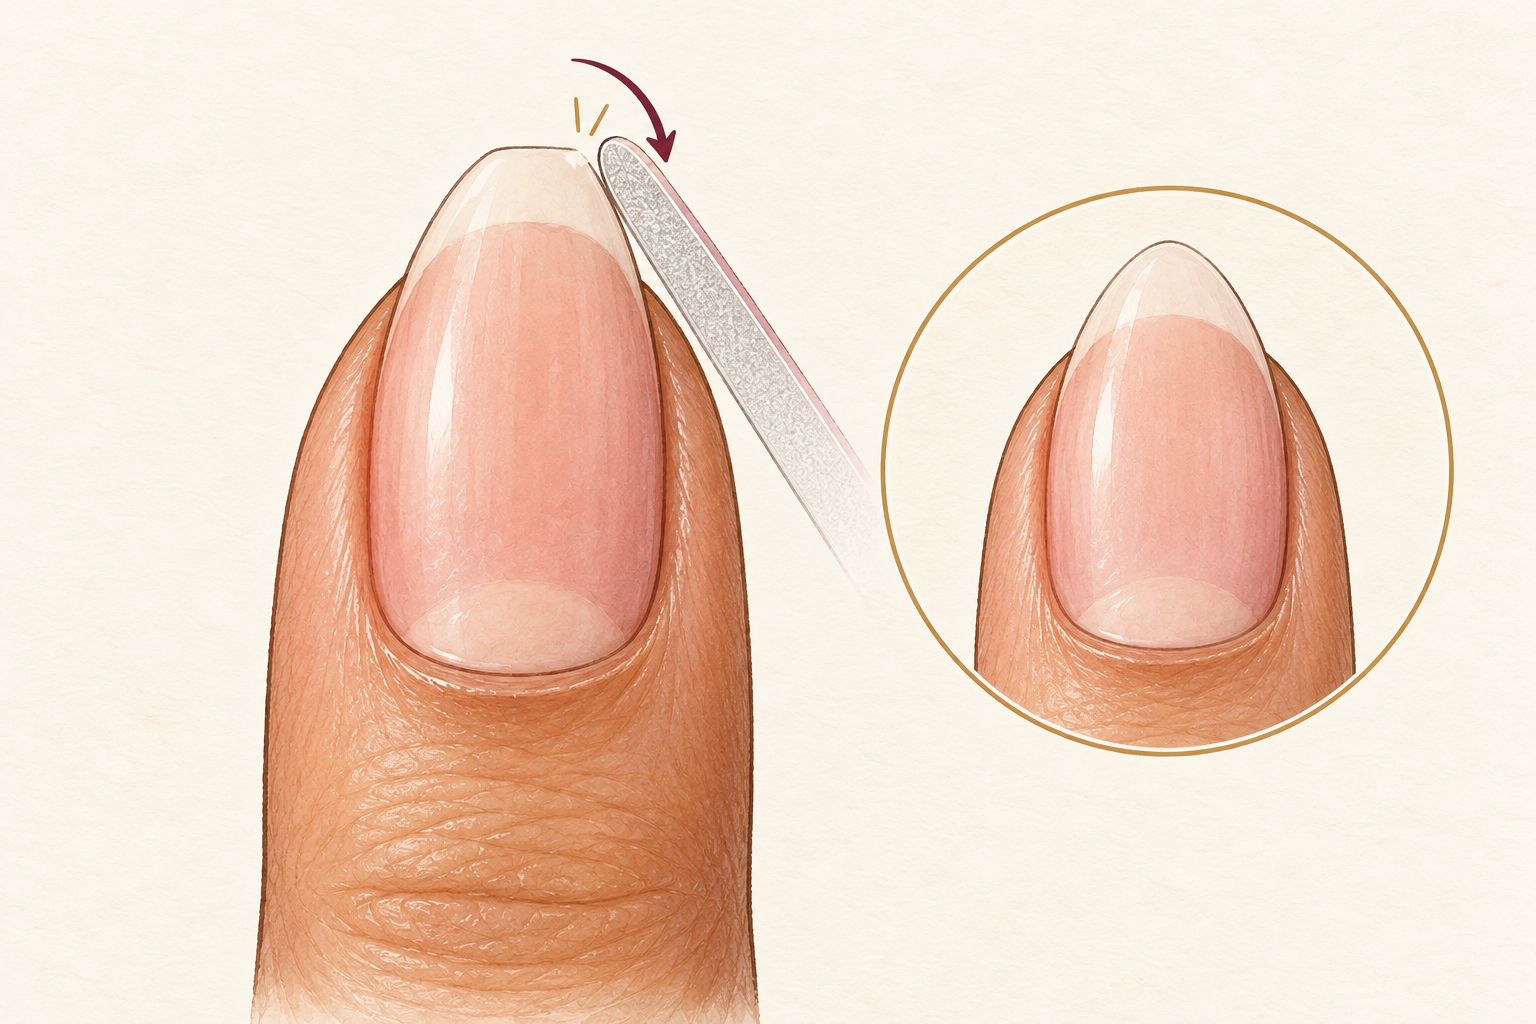
Angle the file at the corner and take it off in small, light strokes toward the center. For oval, round the corners until the edge curves like an egg. For squoval, soften them just a little. For almond, file the sides inward in a gentle taper and stop at a soft tip, never a sharp point. Turn the finger as you file instead of twisting your wrist. Check the shape from the front, since it looks different from the top. Less is more, so stop when it looks nearly right. You can always file one more stroke tomorrow, but a corner filed too far takes weeks to grow back.
8. Compare both hands
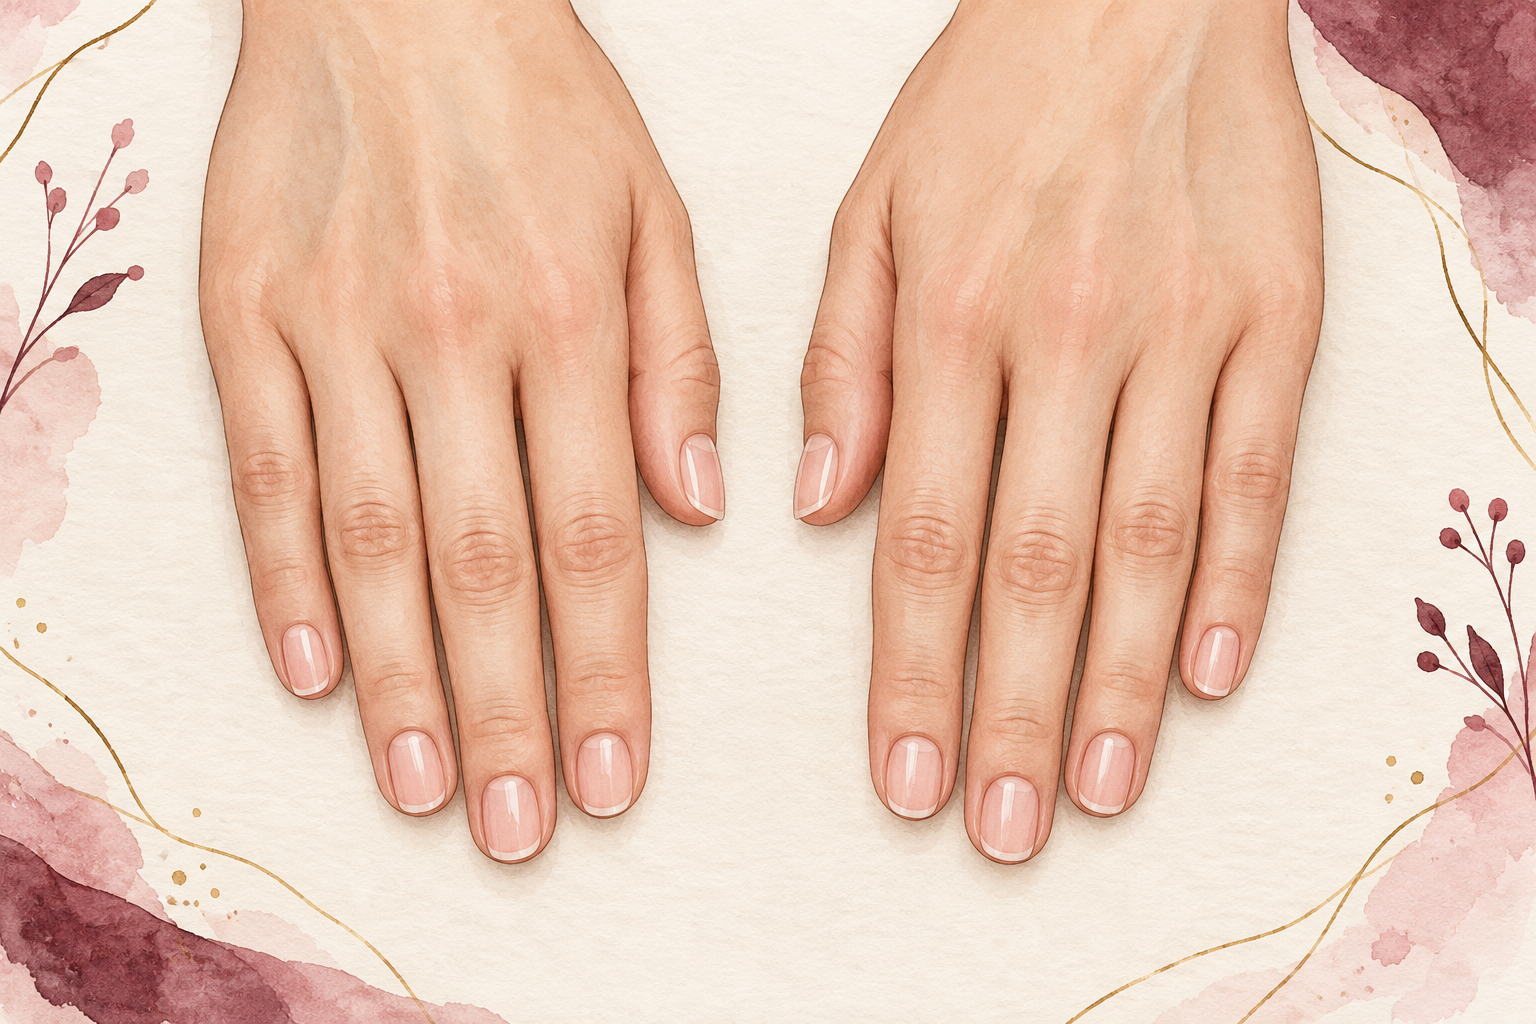
Hold both hands side by side, fingers together, and check that the shapes match. Look at the length first, then the curve of each corner. If one nail is a little shorter, bring the others down to match instead of trying to grow one up. Turn your hands to the window and look again. An uneven pair is the most common reason a manicure looks homemade. Take your time here, and file a little at a time on any nail that stands out. Even shapes make plain nails look polished. Look at your hands the way someone across the table would see them, and fix whichever nail catches your eye first.
9. Smooth and seal the edge
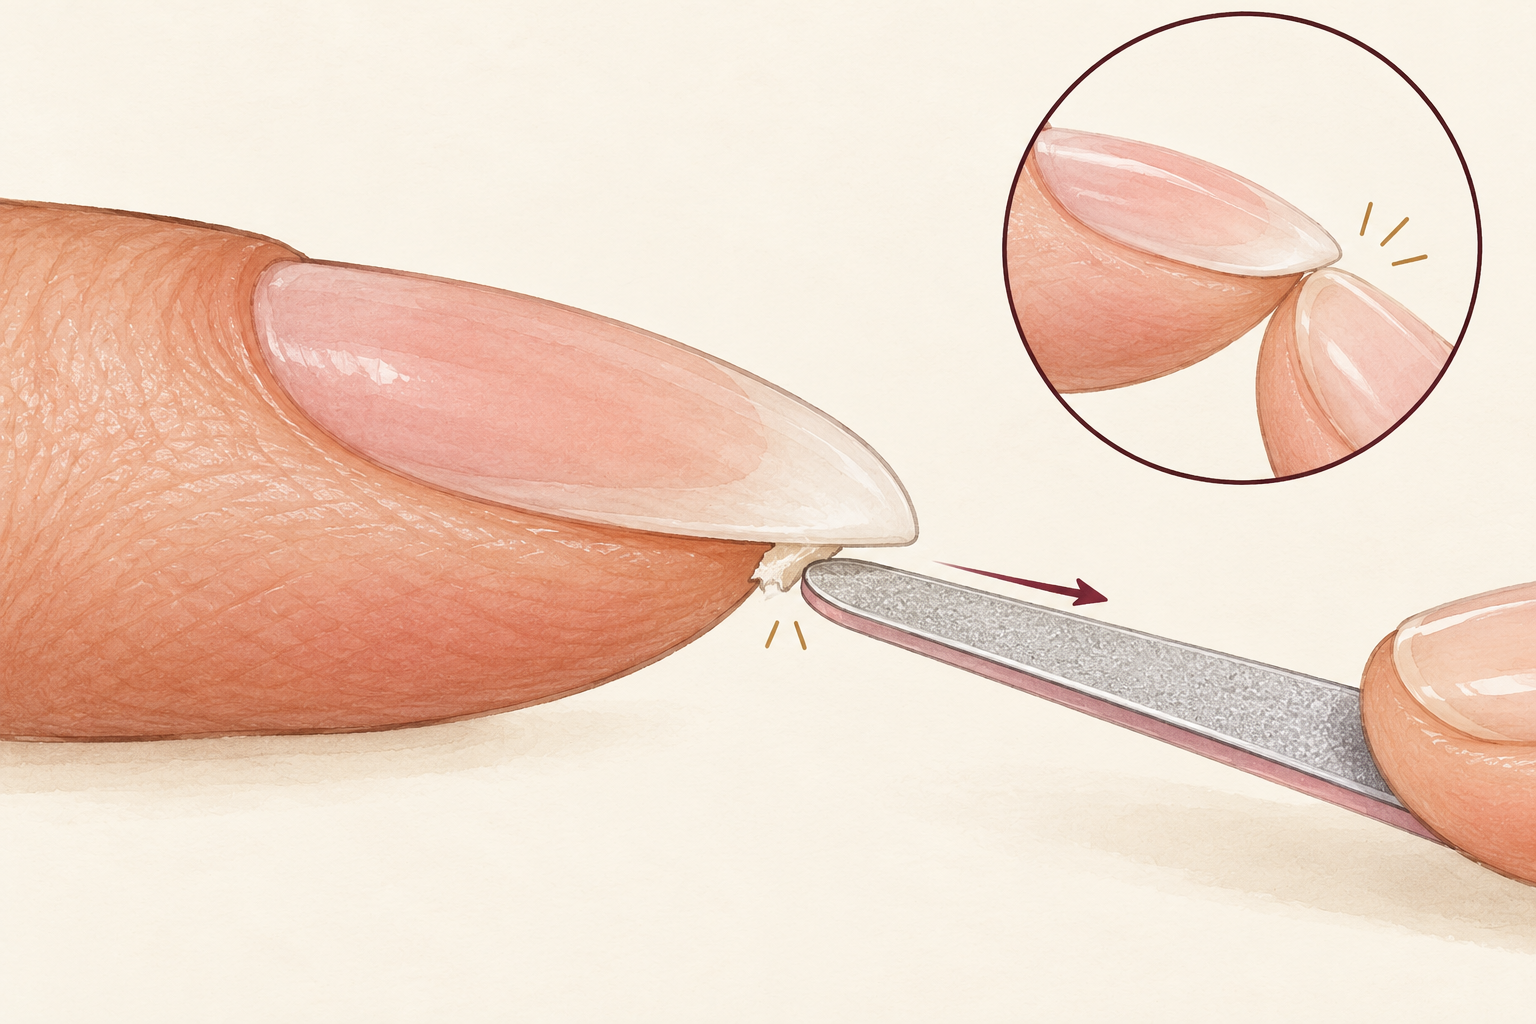
Glide the soft buffer lightly over the edge, then run the file once under the tip at a slight angle. This smooths the tiny rough lip that catches on sweaters. Do not buff the top of the nail, because buffing thins it. Check each edge by running a fingertip across, and if you feel a catch, smooth that spot again. A sealed edge means fewer peels in the week ahead. Keep this step gentle, and use the buffer for a few light strokes only. Wipe the dust away with a dry soft cloth, and wash your hands before you add oil.
10. Fix the common slips
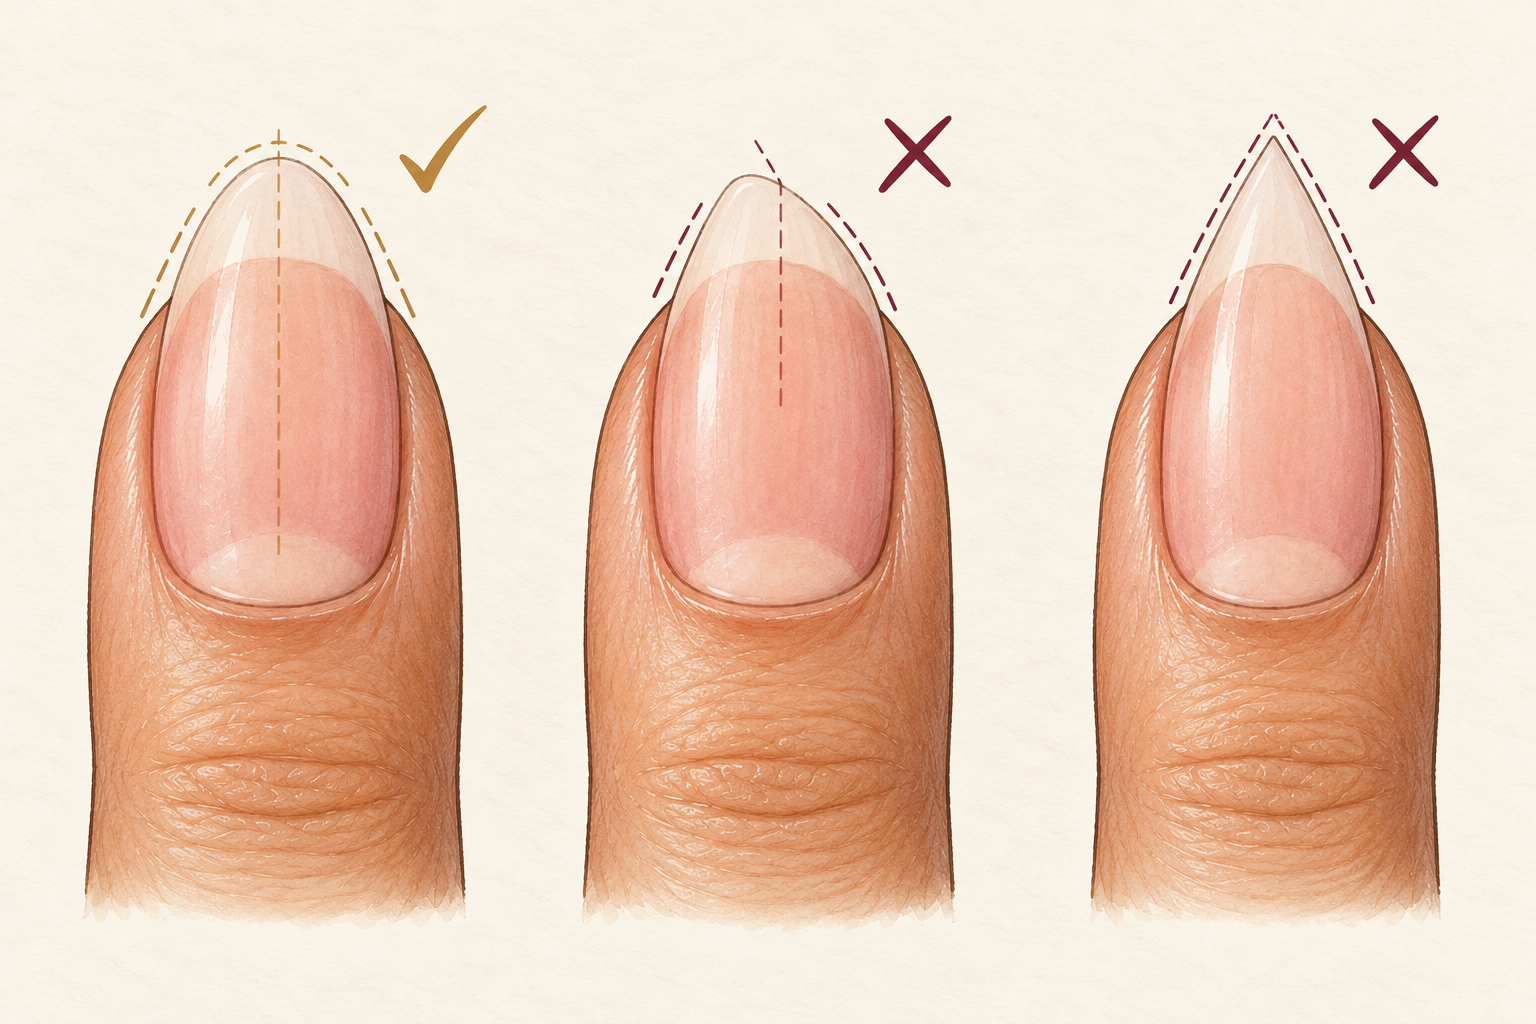
If you filed too far, stop and even the rest out instead of chasing the line. If one side is shorter, take the other side down a touch. If the tip looks too pointed, round it with two or three strokes. If a nail splits, file it just below the split and seal the edge, then keep that nail short for a week. Do not try to fix a deep tear with glue. Fixing a slip early means a shorter nail for a few days, which is better than a broken one for a month. A clear coat on a split nail gives the edge a little extra support while it grows.
11. Oil and moisturize afterwards
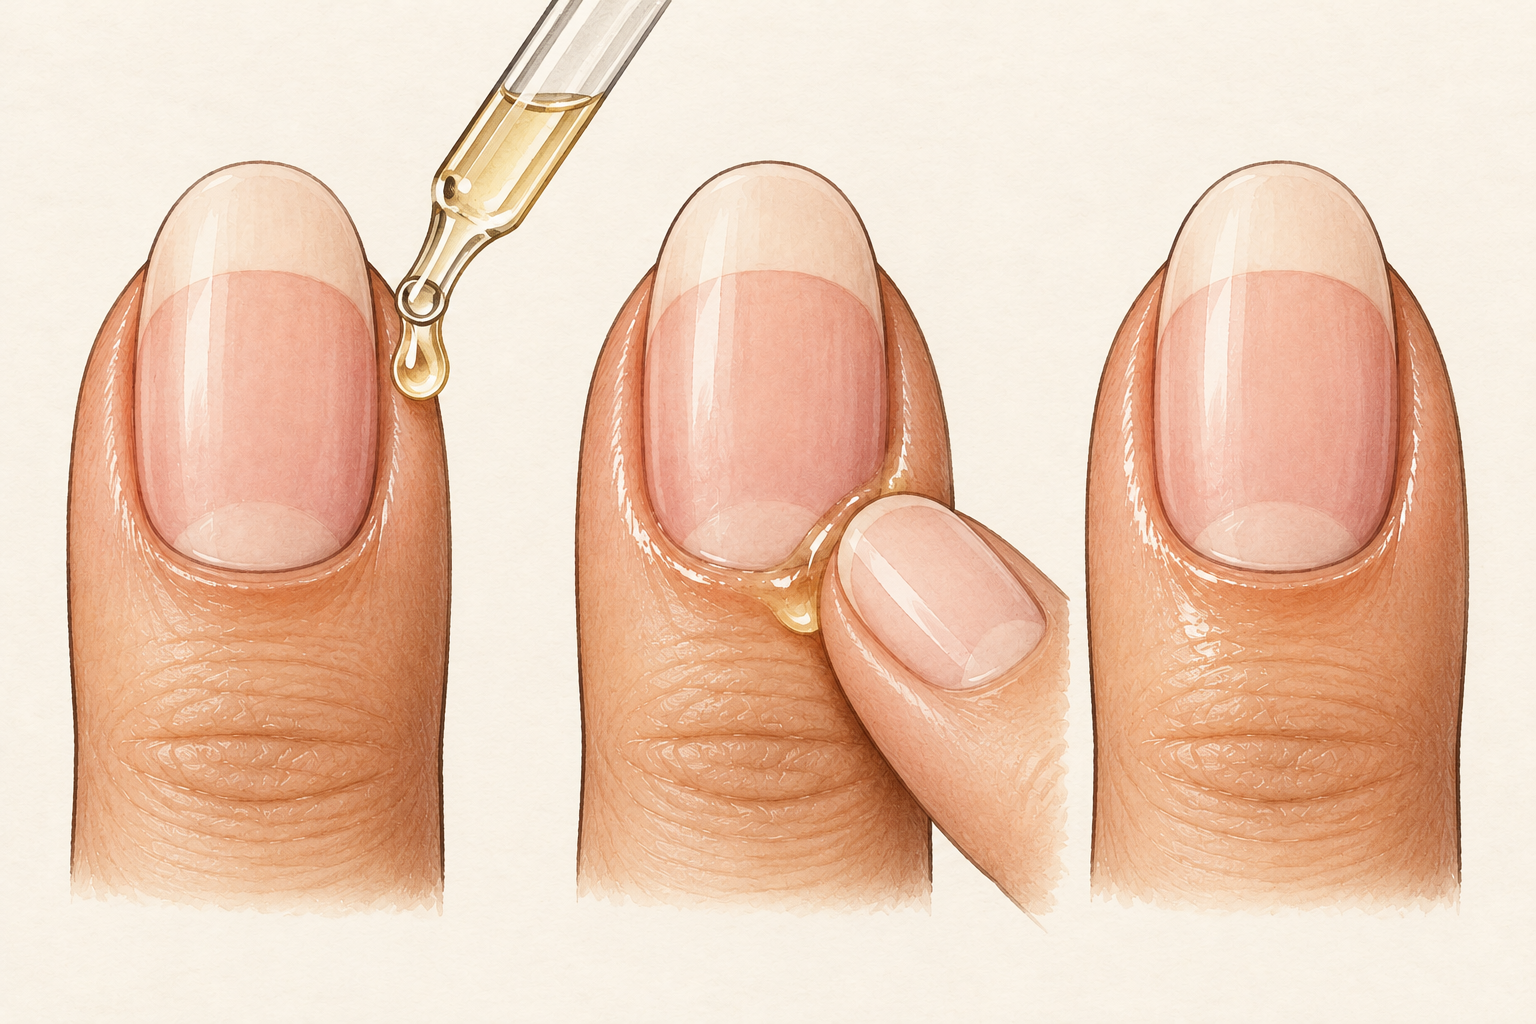
Press a drop of cuticle oil onto each nail and rub in hand cream. Filing dries the edge, and the oil helps it flex instead of snap. Wash your hands first to rinse away the dust. Massage the oil into the skin around the nail for ten seconds each. Do this at night while your hands are still, and your nails will look glossy by morning. Keep the bottle on your bedside table so you never forget. Dry nails break at the corners, so look after the shape you just made. Gloves for washing up keep the edges from going soft and then brittle.
12. Redo the shape once a week
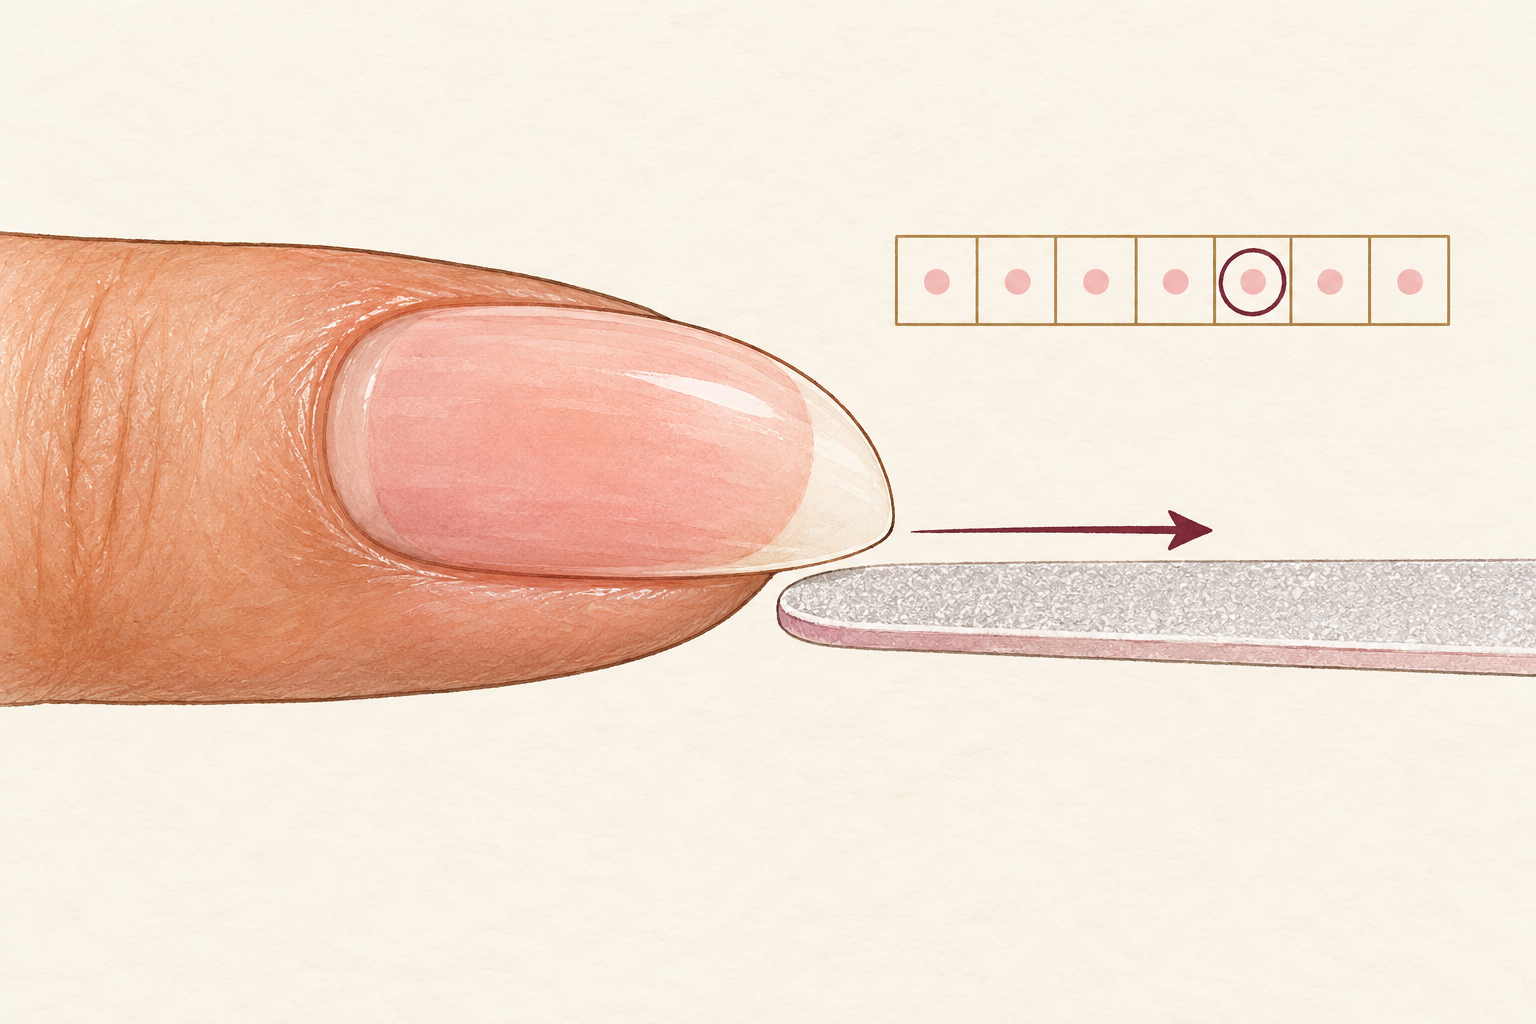
Spend five minutes every Sunday touching up your shape with the fine file. A tiny weekly tidy beats a big repair once a month. Snags caught early do not turn into splits. Notice how your nails wear, such as the corners or one finger that takes all the knocks, and adjust the shape. If you keep catching the same corner, soften it a little more. After two or three weeks the shape becomes second nature. Take a photo of your best set so you can copy it next time. Learning how to shape nails well takes a couple of tries, so go easy on yourself.
Complete the Routine: How to Shape Nails Again Next Week
Tonight, pick one shape and try numbers 4 to 8 on a single hand first. Shaping gets easier with repetition, so the guides below will help you pick up the next nail skill.