You file your nails into an almond, and they come out lopsided, too pointy on one finger and too blunt on the next. It is easy to get wrong because every nail needs a slightly different taper. These 12 steps show you how to shape almond nails on natural and short nails, one stroke at a time, so start at number one tonight.
1. Check how much almond your nails can take
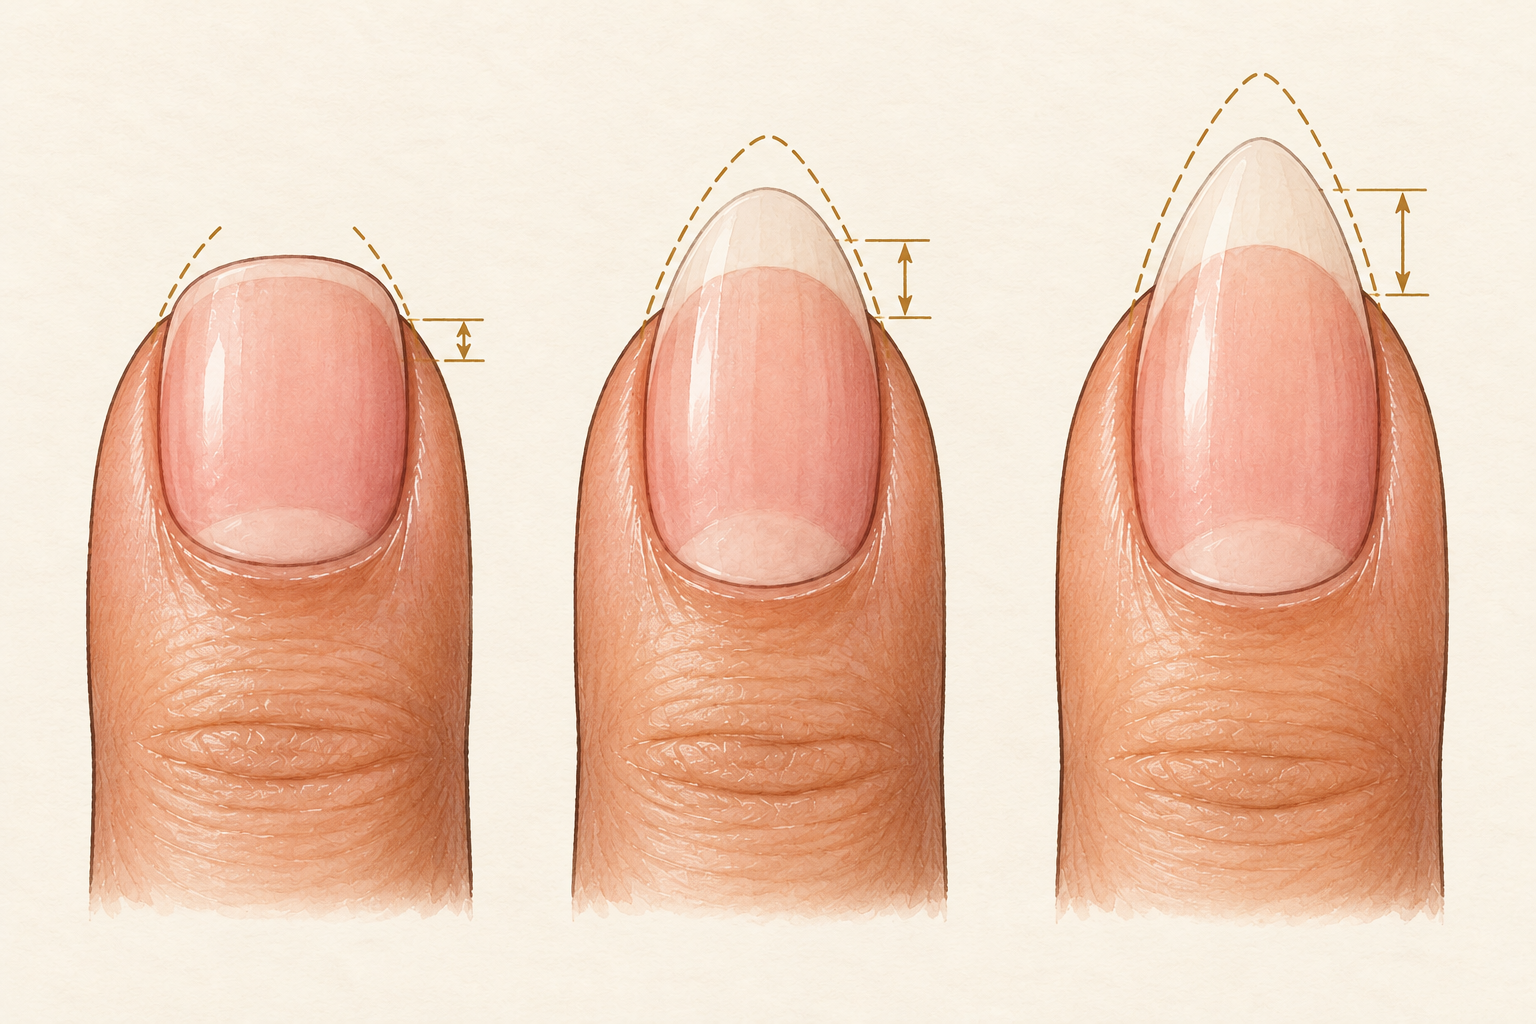
Look at your free edge, which is the white tip beyond the pink nail bed. If you can see a few millimeters of it, you have enough to file a soft almond. If it is almost nothing, aim for a gentle oval with slightly tapered sides and wait for growth. A soft shape you can keep beats a sharp one that cracks by Friday. Only taper as far as your nail allows. That is the catch with almond nails on short natural nails, and it saves you from filing away strength you cannot put back. Press a finger on the tip to feel how much nail is really there.
2. Choose a fine file you can control
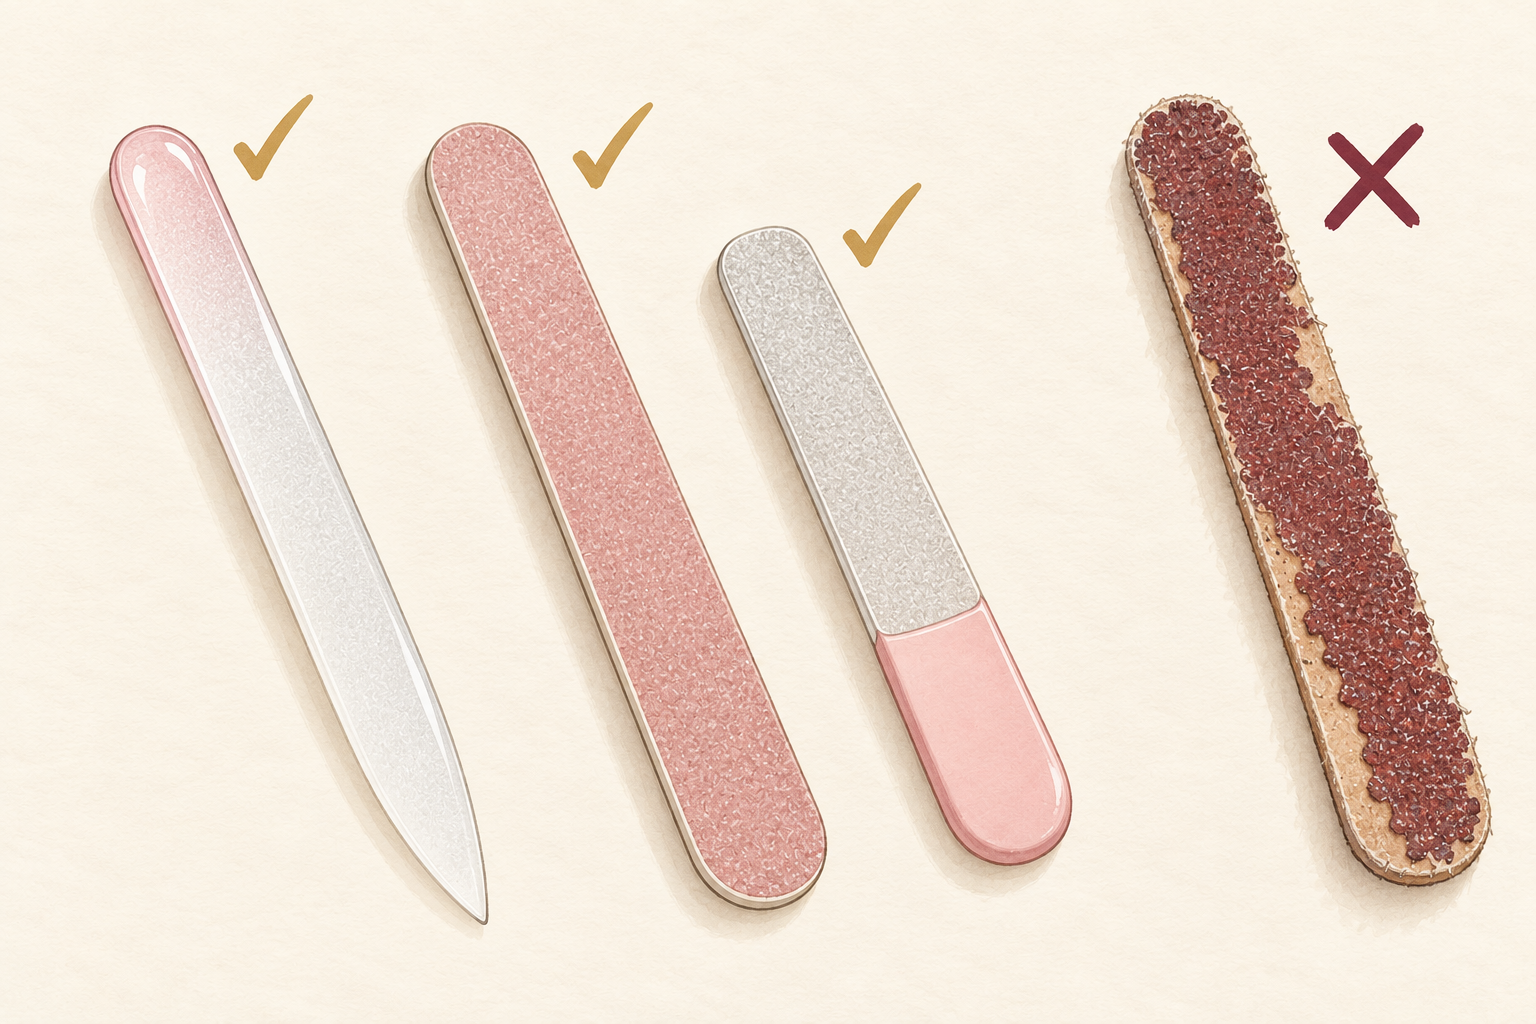
Pick a fine grit emery board or a glass file, and make sure it is still sharp. A coarse board removes nail quickly, which is the last thing you want on a shape you are still learning. A short, flat file is easier than a curved one, because you can see the edge you are working on. Keep it clean and dry. A worn file tears the edge instead of cutting it. If a file feels scratchy on your fingertip, it is too rough for your nails, so swap it. Fine grit leaves a smooth, sealed edge that does not peel. A fresh file costs very little and makes the whole job easier.
3. Clean, dry and even out the length
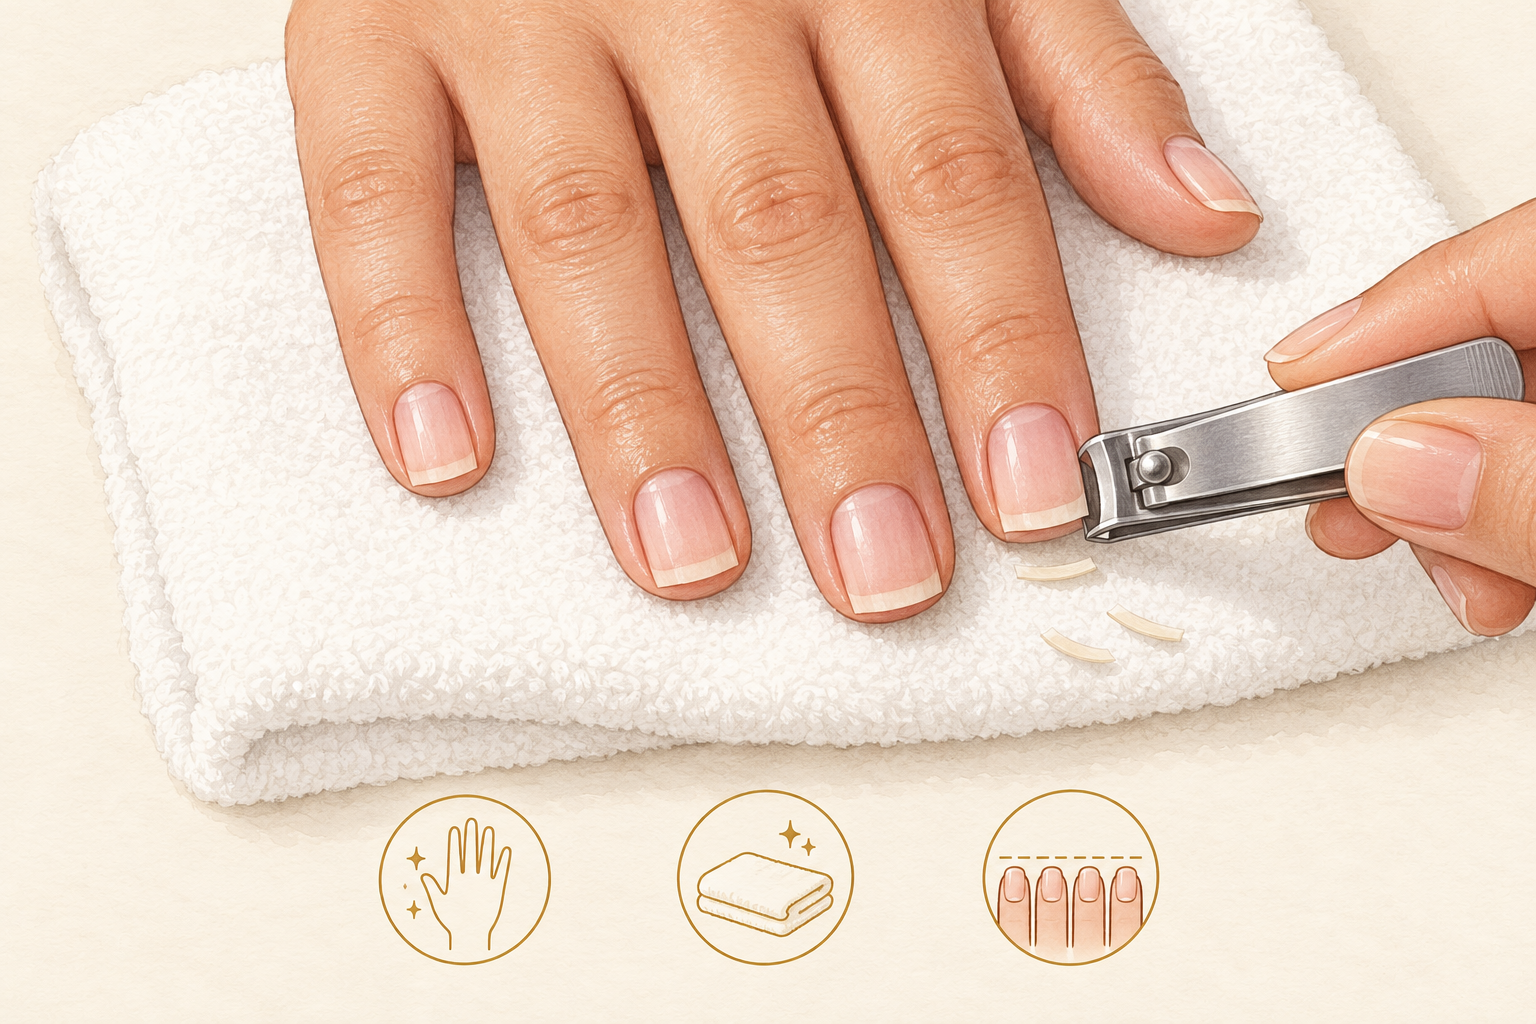
Wash your hands, remove any polish and dry your nails fully before you pick up a file. Nails soften and bend when wet, so filing them damp leaves a rough edge. If they are uneven, clip them to about the same length first, cutting almost straight across. Do not round or taper with clippers, because the file does that more neatly. A level start makes the almond easier to match across all ten. Take your time here, and you will save yourself a lot of filing later. Brush the clippings off the table before you begin.
4. Start with a clean square
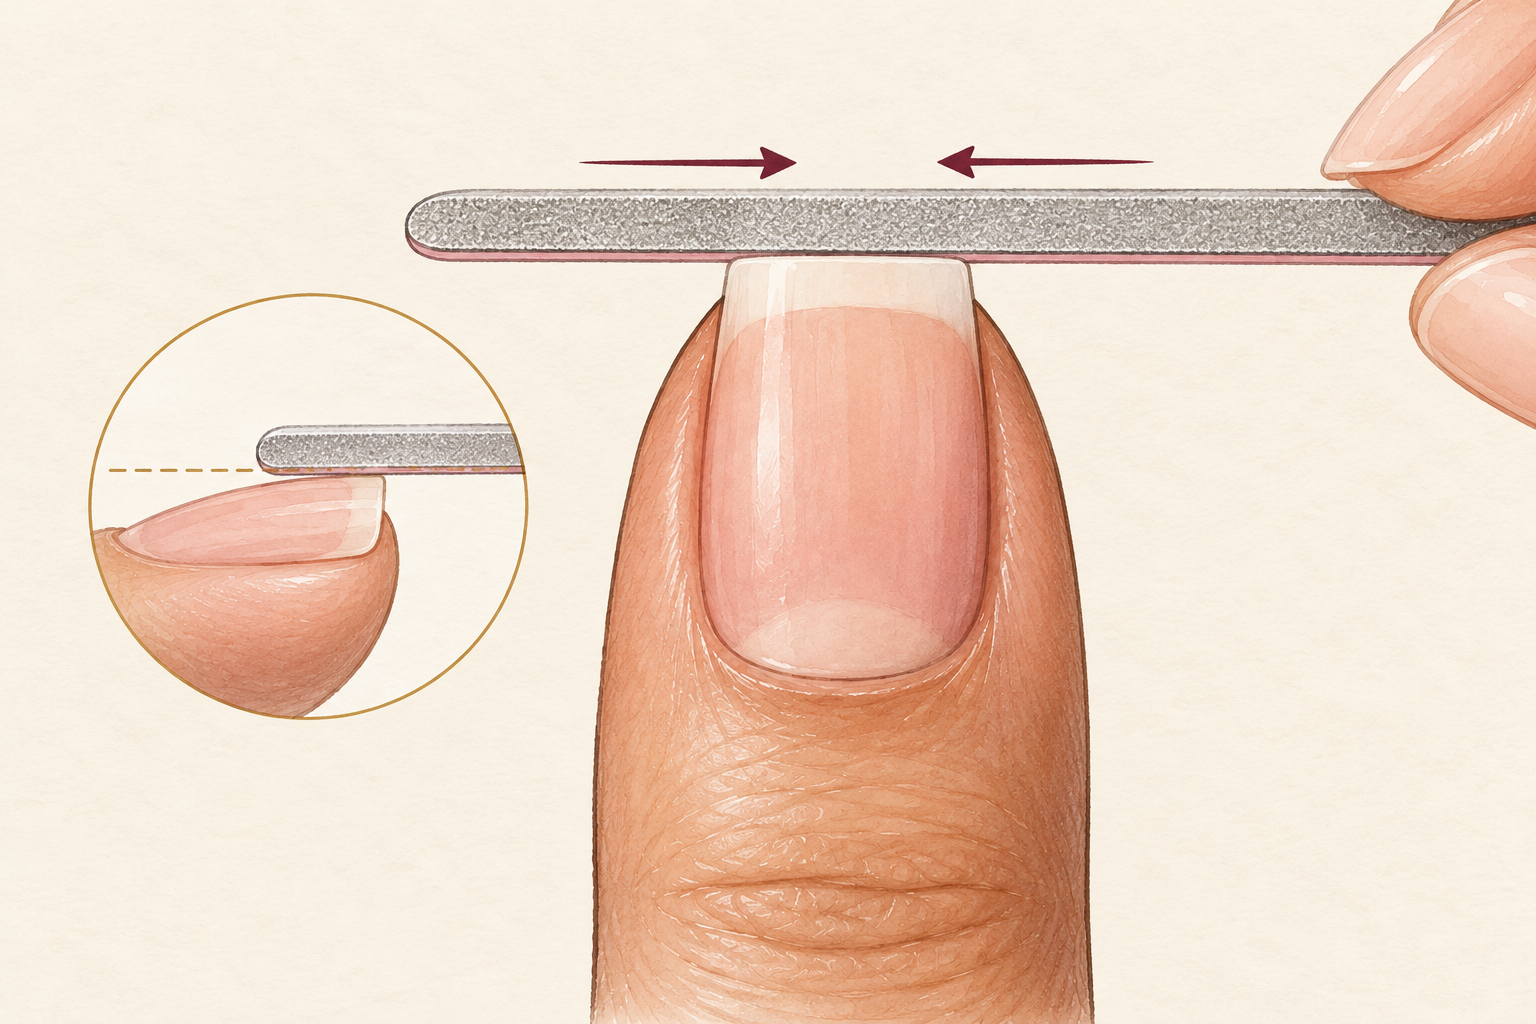
File the tip flat across so the nail ends in a straight line. Hold the file level and stroke from the outer edge toward the middle, never sawing back and forth, because sawing weakens the nail. Do the same from the other side. This gives you a symmetrical canvas to taper from. If the square is lopsided, the almond will be too. Fix it now, before the sides are narrowed. A straight tip is the base of every good almond. Check the line against the edge of your thumb for an easy straight guide. Do not worry about perfect, because the next steps will soften any wobble. Taking the stages one at a time is the calm route through how to shape nails step by step.
5. Taper the sides toward the center
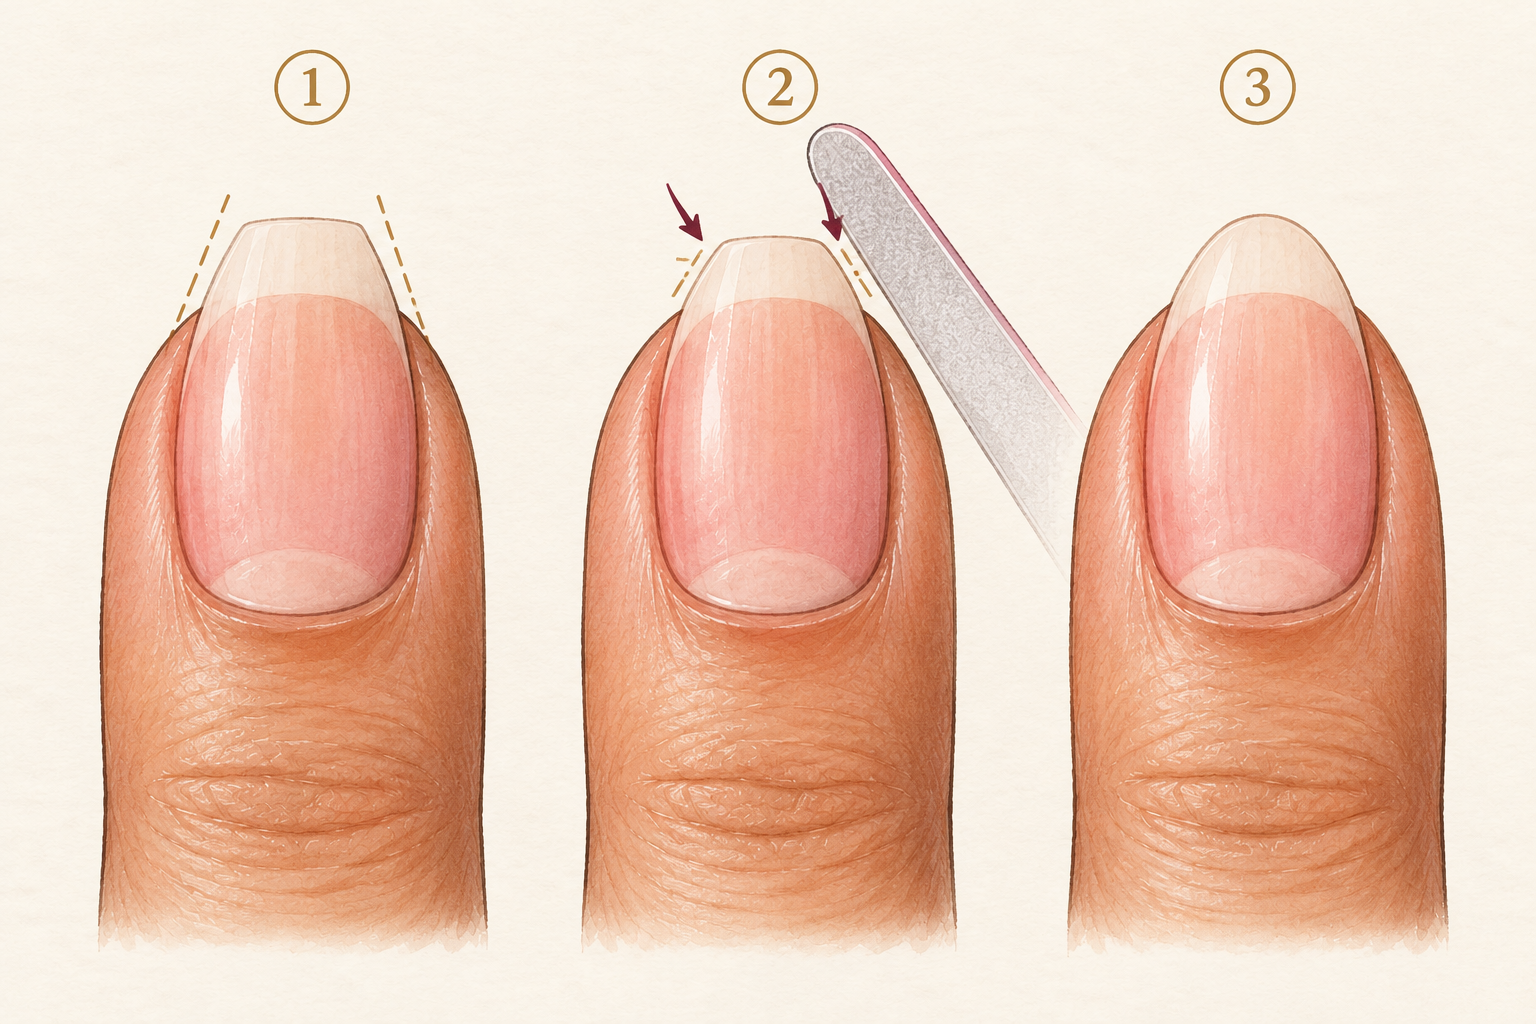
Angle the file along each side and take away a little nail, narrowing the tip toward the middle. Work in small strokes from the base of the free edge outward, and stop when the sides slope gently. Keep the same angle on both sides. Never file down into the skin edge at the sidewall. The goal is a soft slope, not a steep triangle. A steep one leaves a thin tip that bends and splits. Count your strokes on each side, so the two sides stay equal. Rest your elbow on the table to keep your hand steady.
6. Round the tip last
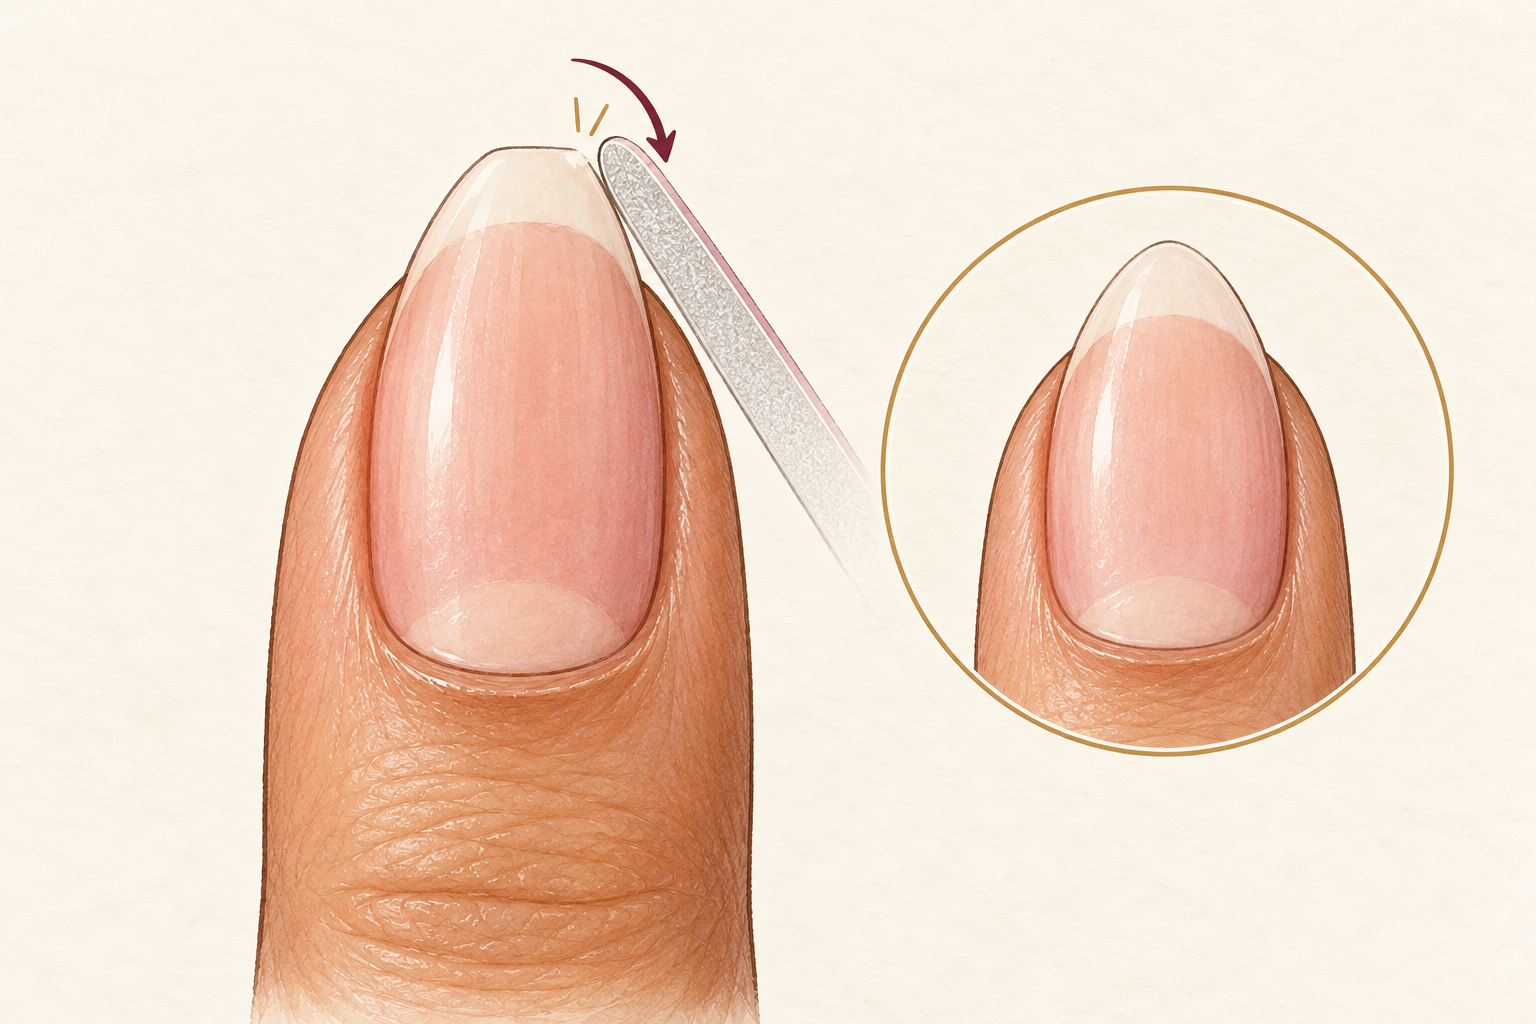
With the sides narrowed, use light strokes to round the two corners into one smooth curve, like the top of an almond nut. Do not turn the tip into a point. A tiny flat or rounded top is stronger and still reads as almond. Stop the moment the curve looks natural, because every extra stroke is a small loss. File lightly, since the tip is the thinnest part of the nail. Smaller strokes feel slower, but they are far easier to correct. Hold your hand up to the mirror after each pass.
7. Look from the front and from above
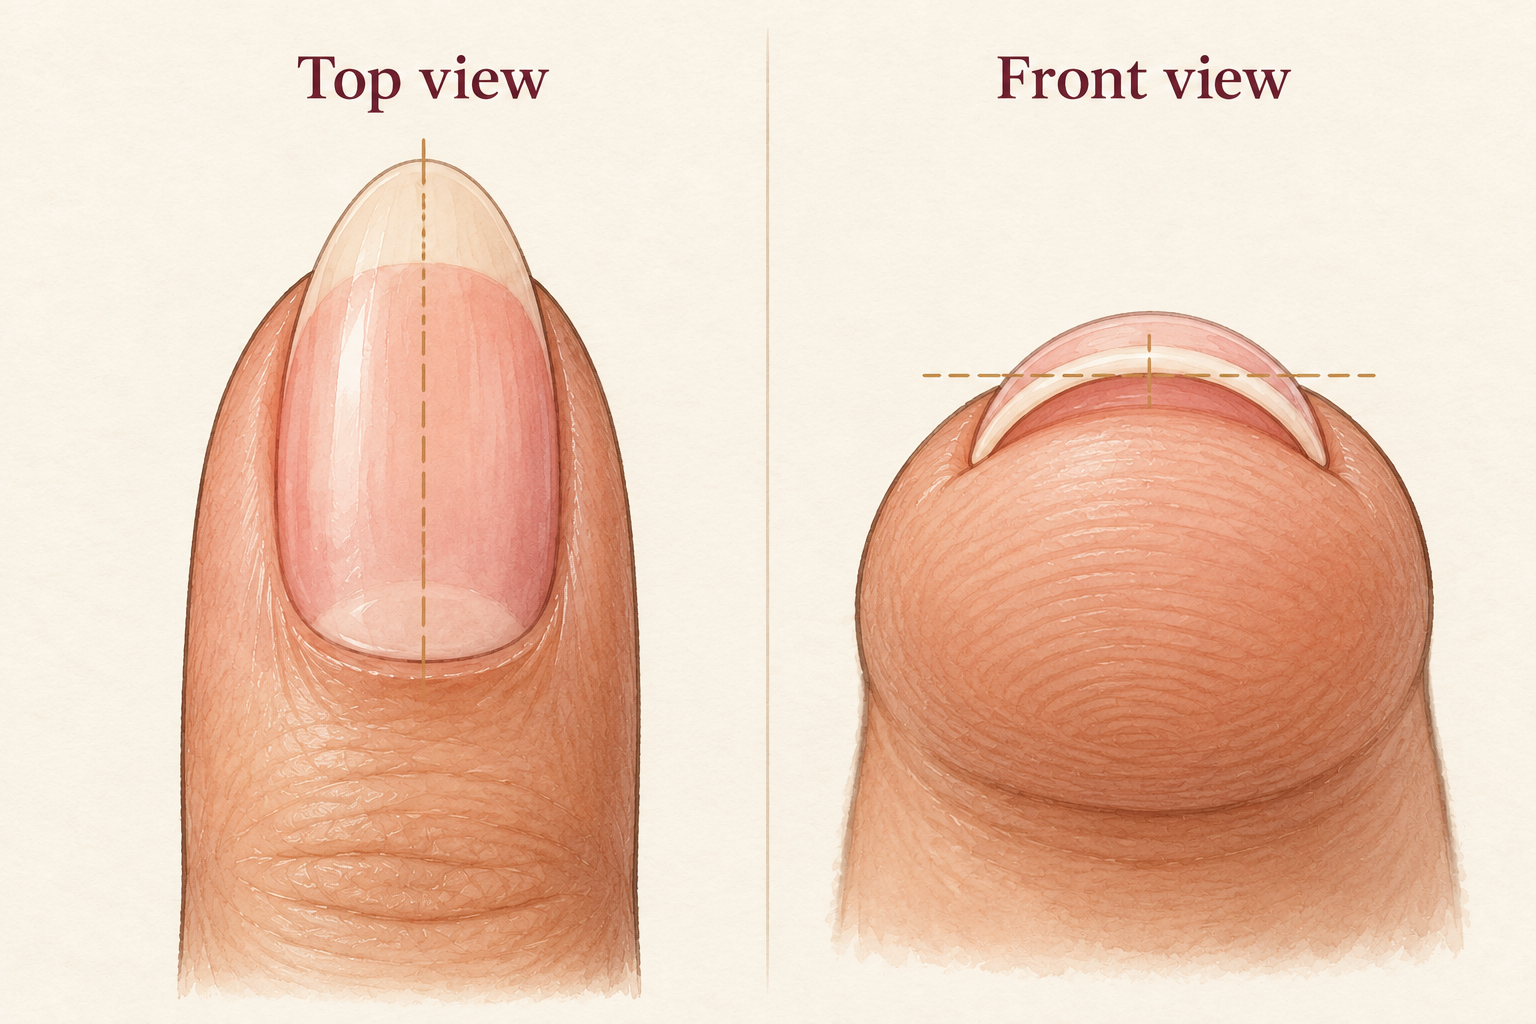
Hold your hand out flat and look straight at your fingertips, then compare the slope of the left and right sides on each nail. Turn your hand and look from above to check the center line of the tip sits in the middle. A small mirror or your phone camera helps, because the eye misses small differences. Fix any wonky nail with one or two strokes, not a big redo. Check again after each fix, because it is easy to overshoot. Small adjustments always win over big ones.
8. Adjust for short or wide nail beds
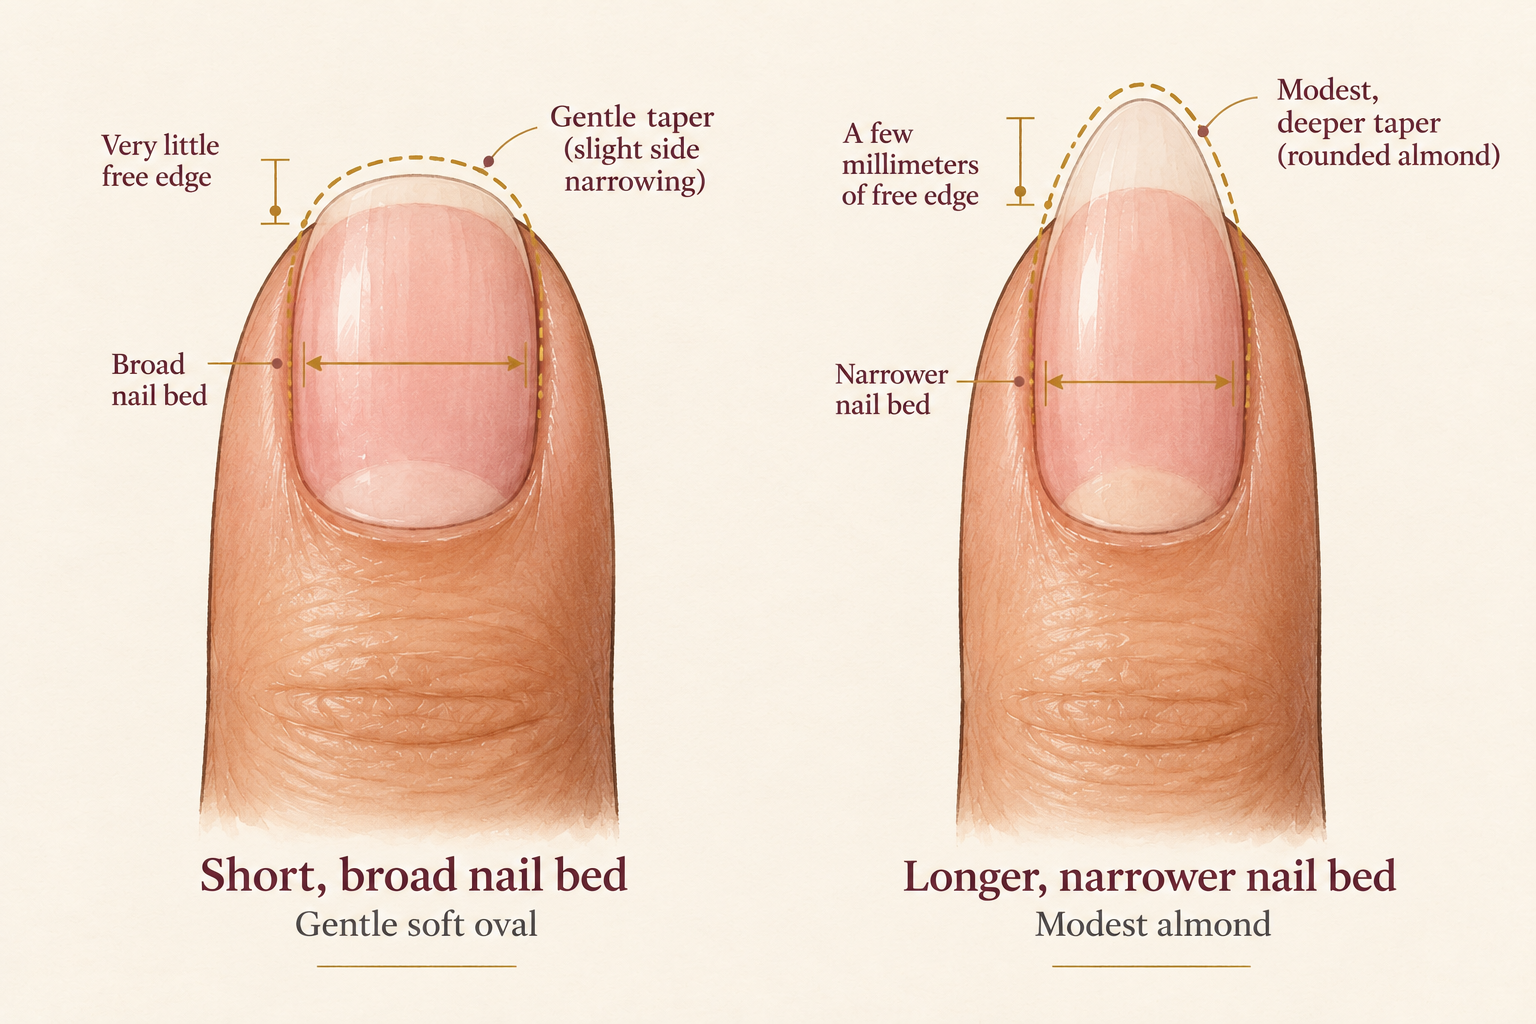
If your nail beds are wide or your nails are short, taper the sides only a little. Over narrowing a wide nail can look pinched and leave the tip thin and weak. A longer nail can take a deeper slope. Match the shape to each finger instead of copying one nail onto all ten. Your thumb often needs a slightly softer curve than your ring finger. This is where how to shape almond nails turns into judgment, not a formula, so trust your eye. A narrow, longer nail can look dramatic, while a wide, short one looks lovely with a soft curve. Very short nails need restraint, so look at how to shape short nails for that.
9. Smooth the free edge
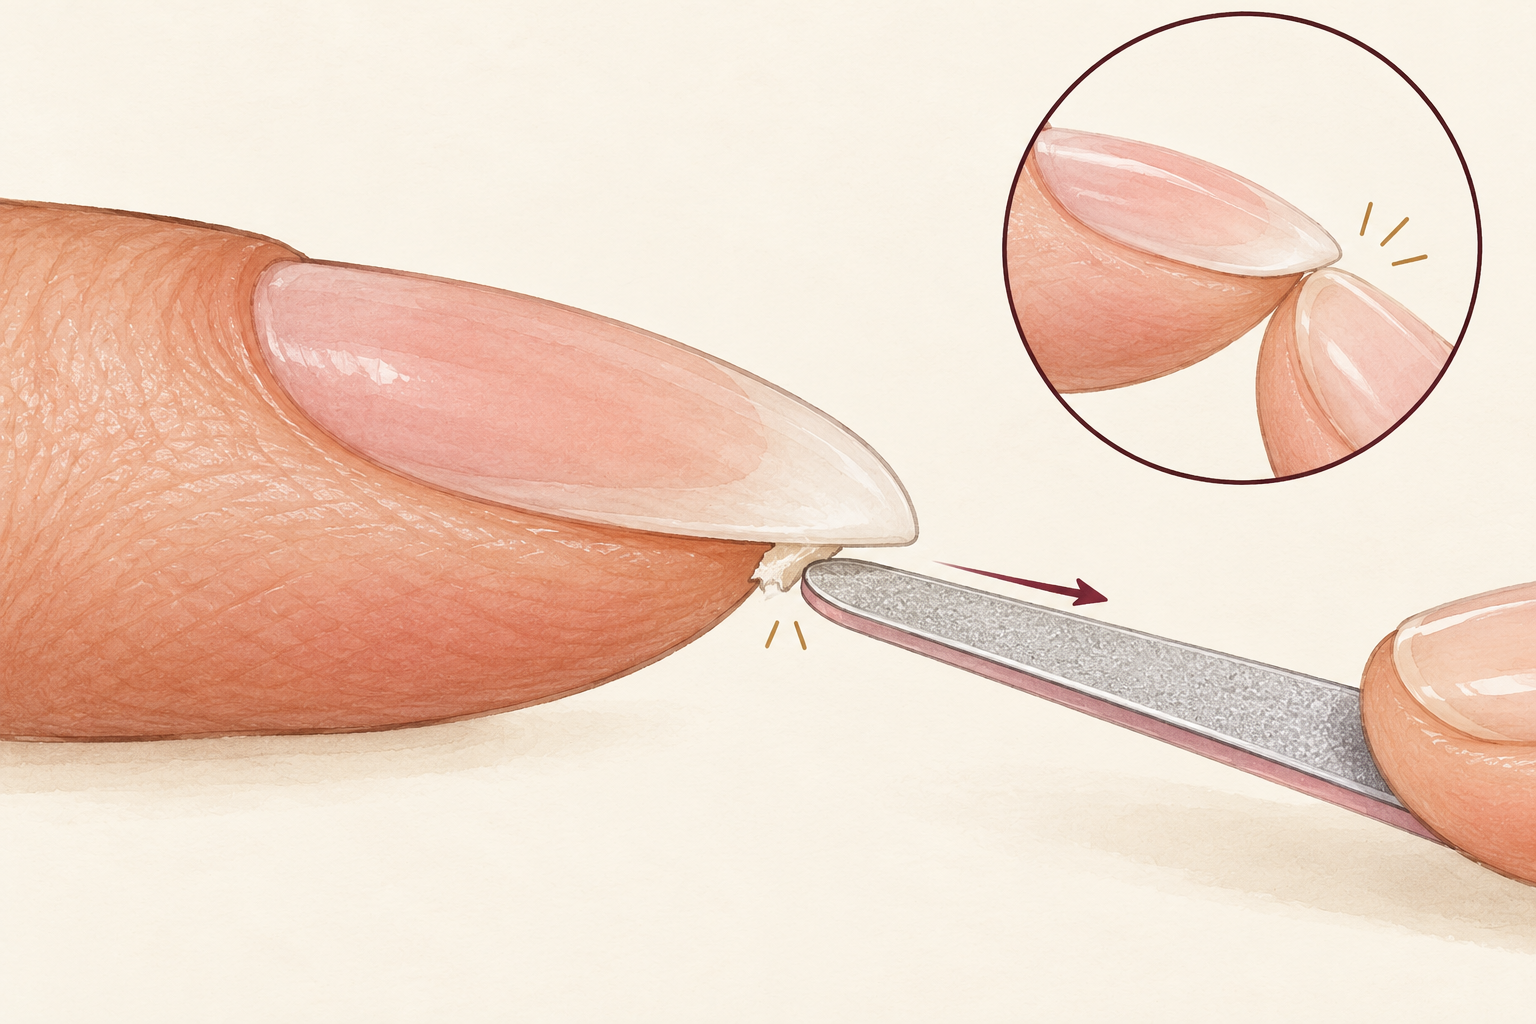
Run your fingertip across the edge, and if it catches, make a few light strokes with the fine side of your file in one direction. Lift the file at the end of each stroke instead of dragging it back. You can also hold the file almost flat against the underside to remove the tiniest burr. A rough edge is where peeling starts. Smooth edges snag less on sleeves and hair, so the shape lasts longer. It takes about thirty seconds a hand. Brush away the dust before you touch your face or anything you want to keep clean. A soft brush or a damp tissue clears the dust quickly.
10. Moisturize and let the shape rest
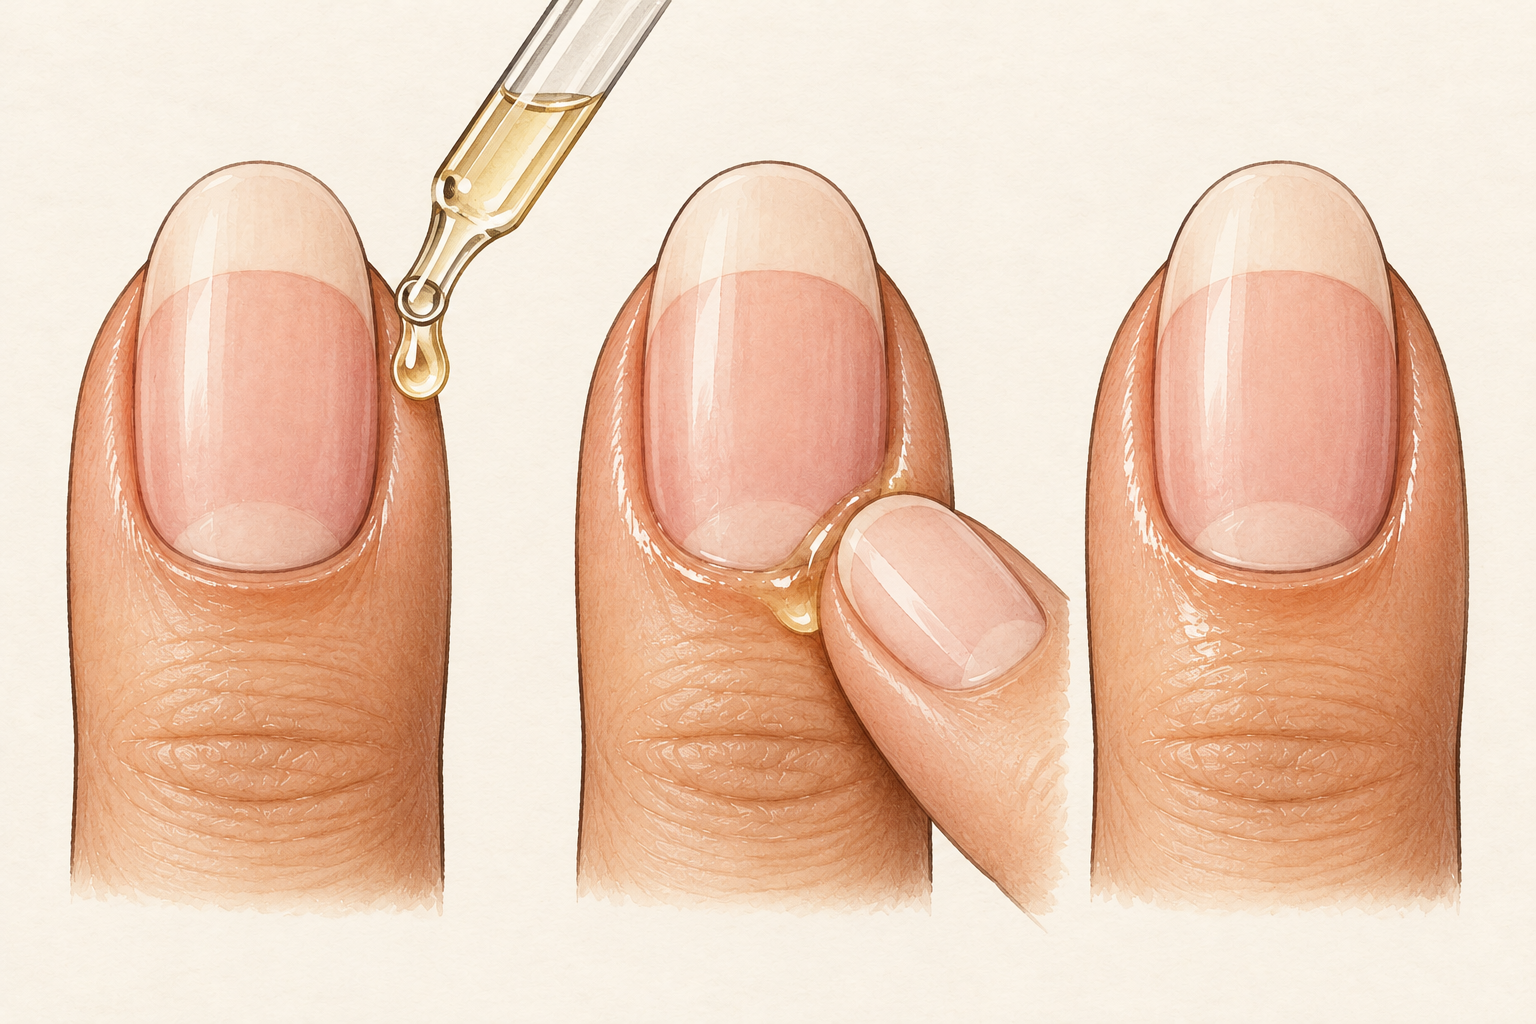
Rub in a little cuticle oil or hand cream straight after filing. Oil helps seal in moisture, but it does not add any by itself, so use it on nails and skin that are not bone dry. Keep the shape for a week before you change it, and avoid biting or picking at it. If you see a split, or the nail feels sore, stop shaping and let it recover. Shorter is always better than torn. Filing little and often gives a neater result than one long session. A calm week of care sets the shape better than any extra filing. Your nails will feel smoother in a day or two.
11. Fix the usual mistakes
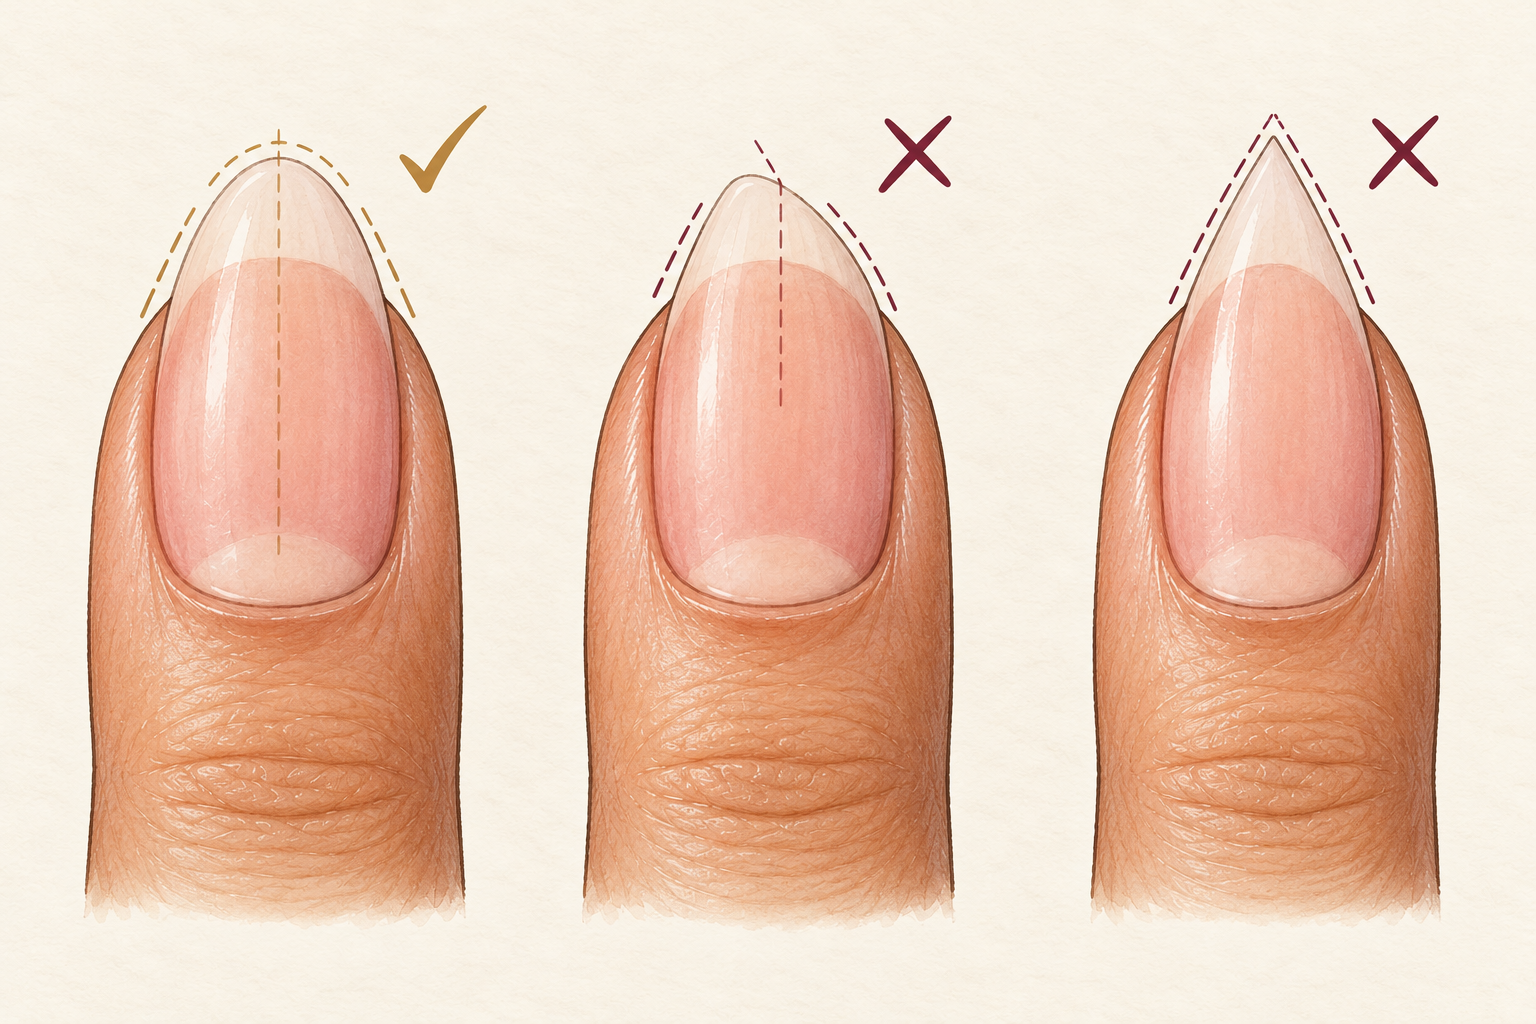
If a tip is too sharp, round it slightly, even if you lose a millimeter. A tip that looks bulky usually needs its sides tapered a little more. A crooked nail needs the longer side filed, not the shorter side lengthened. If one nail ends up much shorter than the rest, bring the others down a touch instead of waiting for it to grow. Patience beats panic here, and a fresh almond is only a few strokes away. Learning to undo small slips is most of the skill. Keep the file close, because most fixes are two strokes long.
12. Touch up once a week
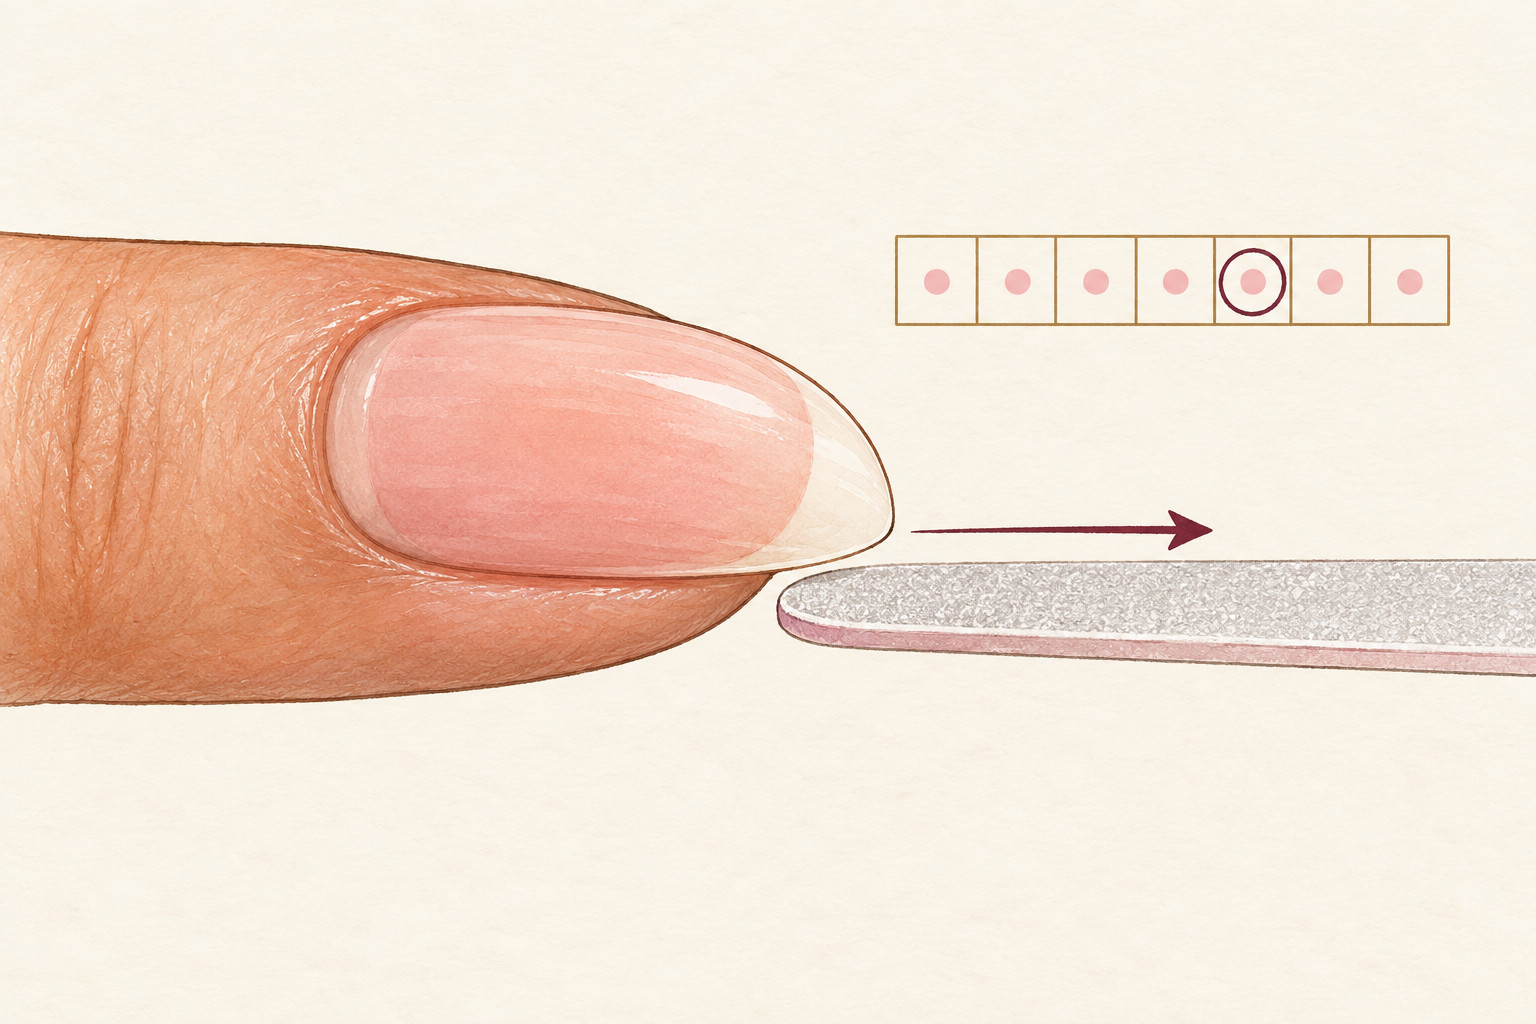
Check your shape once a week, and file only when it has visibly drifted. In week one your first almond may look a little rough, and that is normal. By week four you will file faster and match better. By week eight the shape feels automatic, and you may be ready for a little more length. Touch up with a few strokes instead of a full reshape, to keep nails strong. Nails grow slowly, so a wobbly first try simply gets corrected next week. Write down which fingers needed the most work, and start there next time.
Complete the Routine: How to Shape Almond Nails and Keep Them Strong
Tonight, file one hand only, then check it in a mirror before you start the other. Each try teaches you a little more, and the guides below will point to what to practice next.